5 Tips to Improve Your Lightroom Workflow

Lightroom is the king when it comes to handling large numbers of photos. With there being no real expense to taking a photo, unlike when people shot on film cameras, it’s fairly easy to find yourself importing hundreds of images at a time into your Lightroom library. We all have our own workflows when it comes to editing (the pattern of actions we tend to repeat with each photo), but we’re not always doing things the most efficient way possible. In this article I’m going to look at some things that you should add, or adjust, to your own Lightroom workflow to make sure you are working efficiently and effectively. Editing shouldn’t always feel like a chore.

#1 Prune Your Library with Flags
Deleting photos. It’s that scary moment where you have to let go and ditch the ‘rejects’ from your library with little hope of recovery. But it’s an essential process, unless you want to have stacks of hard drives just to store all the data. After every shoot, you should prune your photos and choose your favourites, as well as those headed for the bin. This process can be made easier by using Lightroom’s flagging feature.


When you find an image that you want to return to, perhaps the highlights of the session, then select it and hit the ‘P’ key on your keyboard. This marks the image as ‘Pick’, allowing you to mark it for attention and return easily later on by utilising the library filters.
To select an image for deletion, highlight it and hit the ‘X’ key. This will mark it as ‘Rejected’, but it won’t delete it just yet. Carefully go through your imported photos and be critical, removing those that aren’t up to standard – there’s no point keeping them there for no reason. If you’ve taken multiple frames of the same thing, choose the best from the selection and reject the rest. Make sure to check which is the sharpest though.
You don’t need to bin all of the rejected photos just yet. I recommend you then move on to processing the best photos, and leave the deleting to another day when you can take a fresh look to ensure you’re making the right choices. But once you’re ready, just navigate to “Photo > Delete Rejected Photos…” and take the final step.
Further Reading: “Keyboard Shortcuts for Photoshop & Lightroom CC“
#2 Keyword Your Photos

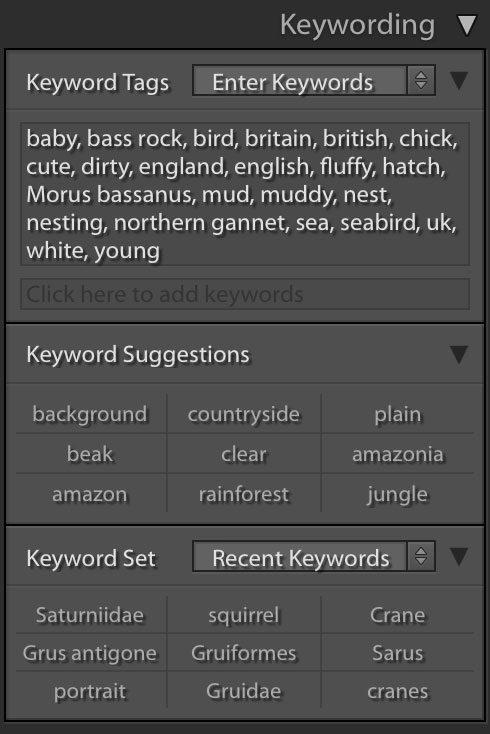
Due to the nature of Lightroom, you can add keywords to multiple photos at a time, but make sure they are relevant. Around 20-30 keywords for a photo is great going, and you should add the following:
- Species & common names
- Location name
- Colours
- Description of scene (this makes up the bulk of your keywords)
Lightroom will try to make things easier for you by suggesting possible keywords, and you can even create sets of keywords should they be relevant on a regular basis. A laborious process perhaps, but keep on top of things and it’ll just become another part of your usual workflow. The advantage of being able to search your own Lightroom library by keyword is invaluable when you are looking through thousands of files to find a specific shot.
#3 Jump to Photoshop Easily
Whilst Lightroom is constantly becoming more and more powerful, it isn’t suitable for making certain edits. This is true for particularly fine adjustments, and using tools like the clone tool for precise adjustments. You can flick between both programs easily, automatically adding your Photoshop edit to your Lightroom library.
Just right-click the photo in question and select “Edit In > Edit in Adobe Photoshop”. The file will then open in Photoshop, bringing with it all of your previous Lightroom adjustments. You can then make further adjustments in Photoshop, which will be reflected in Lightroom. Just remember to make any Photoshop adjustments at the end of your processing workflow, making any alterations in Lightroom first.
#4 Try Solo Mode
Scrolling up and down the adjustment panels in the Develop window can be a tiresome process, especially if you are moving back and forth. But have you ever tried solo mode? This little secret will ensure that when you expand one panel, the previous panel will collapse after it – it ensures that only one panel is open at a time.
You can find solo mode by right clicking the header of a panel and selecting it from the drop down menu that will appear. Simple!
#5 Remove the Clutter
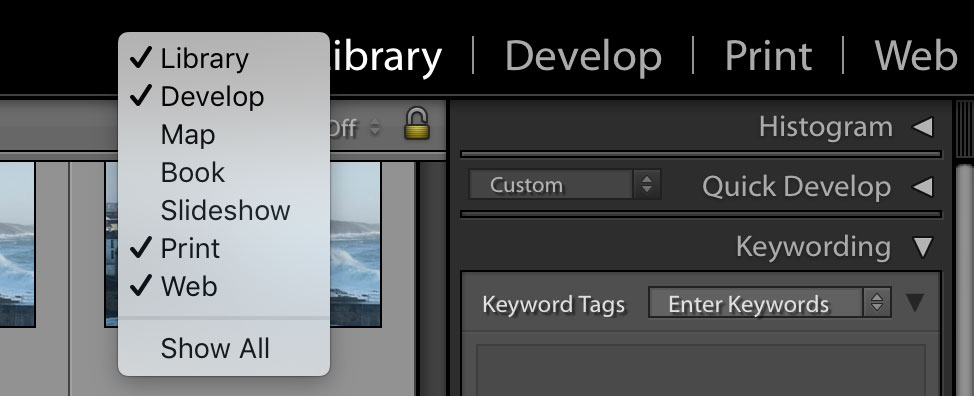
Just like solo mode, you can get rid of some of the clutter around the rest of the Lightroom window. Right click the black bar at the top, and you’ll be able to remove different editing windows. Have you ever used ‘Map’, ‘Book’ or ‘Slideshow’, for example? No? Then get rid of them in an instant to clean things up.
Do you have any hints?
If you have any top tips for improving your Lightroom workflow, then please add them in the comments below!


