How to Photograph Waterfalls

I am always drawn to water with my landscape photography, and there is no finer sight than a majestic waterfall tumbling over rocks. Watching tonnes of water plunging into the abyss is one of the best experiences in nature. Trying to photograph waterfalls and capture their essence, though, is much harder than first thought.
However, as photographers we love a challenge. With the help of a few pointers in this guide, you can approach waterfalls in a new way – hopefully coming away with some memorable images.


Keeping things dry
First things first, as with any photographic outing you will need to be ready for all eventualities. By being well-prepared with some protective kit, you and your equipment can remain dry during your photoshoot.
Waterfalls are notorious for producing lots of spray in the air. Even standing near the foot of relatively calm fall can result in spray covering your lens, filters, camera, and yourself. There is nothing more annoying than out of focus water droplets in your images come processing time.
To combat this, a few handy items you should have on every waterfall photography shoot are:
- Bring a waterproof jacket & over trousers. Also, a peaked cap can work well providing cover from rain/drips.
- Waterproof camera bag cover. Not only to protect from rain or spray, but when placing down on sodden ground.
- Wear wellingtons with a good sole and, if you have them, micro-spikes for extra traction can work well. Wellies will give you the option to be more experimental with your composition, perhaps in the water itself should it be calm and safe enough.
- Bring plenty of lens cloths and a towel to dry your lens/filters and camera before putting it bag in your dry bag.
- Although cumbersome, umbrellas can work well by shielding you and the camera in between shots – especially useful if it has been raining and water is dripping off trees.
Safety advice
Always be safe near water. Never venture into fast moving water, or venture into water you do not know the depth of. Take exceedingly small steps near waterfalls, and assume every surface is like ice – tread carefully.
Always keep your hands free; do not walk around with one hand holding a tripod and camera as you could throw yourself off-balance, causing an accident.
Keep all zips shut on trousers, coats, jackets, camera bag etc. so that you do not lose anything in the water.
Top tips for waterfall photography
1. Avoid the sky
Generally, I would always try to photograph waterfalls on overcast days. It creates global illumination, lighting the scene evenly. While strong sunlight can create some great effects (eg. rainbows or backlit rays through the spray), it is a lot harder to control the overall exposure throughout the image.
On most occasions, falling water appears white. So, if you are trying to expose for the dark shadows of the surrounding scene as well as these bright white highlights, it is going to be very problematic to get it right in camera.
In these overcast situations, if possible try to exclude any of the sky from your compositions. This area will tend to blow out (overexpose). Even if you do manage to retain sky detail by underexposing or exposure blending, it’ll still create an unattractive brighter shape that just won’t sit right with the overall lushness of the falls and its surroundings.
Shooting tight will help to make a much more intimate scene, dedicating the frame to what is best about that composition and location.
2. Seasons
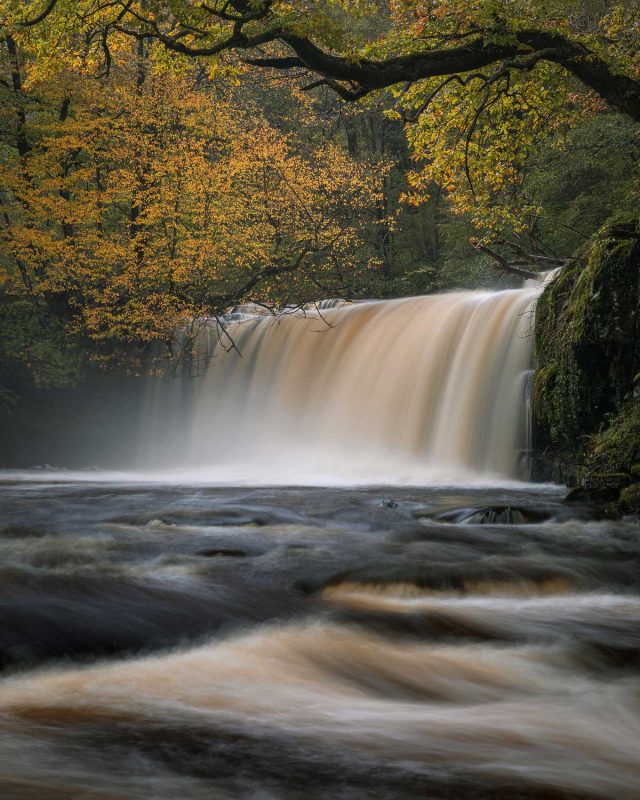
From a small trickle on a summer’s day to a raging torrent in autumn and winter, waterfalls take on different moods and looks all throughout the year. Even on the same day, heavy rainfall can transform a waterfall within a few hours: water levels rise and the water takes on a brown colour.
Time your visits to get the type of image you want, but also remember to visit the same location on more than one occasion throughout the year.
Depending on the water levels, certain compositions at a location are accessible. Or, on the other hand, they get covered over when the river is in spate.
Visit in wintertime and, if conditions allow, you may even find the falls frozen, with large icicles providing striking elements. So, being flexible with your visits will allow you to get the most out of any location.
3. Composition
Composition is key to good waterfall photography. Factors such as using natural elements to convey depth or use connecting lines work well. Use elements like the natural shape of the river; you can join the foreground towards the main focal point in the scene.
Read more: Composition in Landscape Photography – The Essential Guide
Here are a few ideas for you to try:
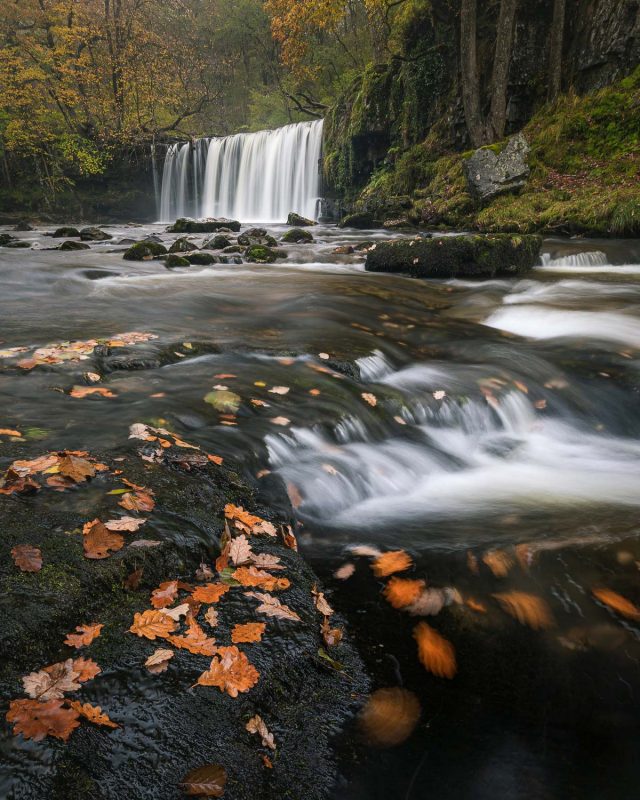
- Use prominent foreground subjects, such as a big mossy boulder or fallen leaves, to add some impact and scale to your images.
- In shallow, calm rivers at the base of waterfalls, shoot from a low position just above the rushing water for a unique perspective.
- The falling water will be the brightest part of the image that your eye is drawn to, so remember to have some breathing space around it. Keep a good margin either side of the falls.
- Lookout for leading lines to take the eye through the image, with the path ending at the falls. Try it with a fallen log, a series of smaller rocks, or even the blurred and sweeping lines made by water bubbles on a long exposure. They are all an effective way of creating a journey for the eye.
- Also look for trees or natural elements which can frame the waterfall or, at the very least, help direct the eye to the falls.
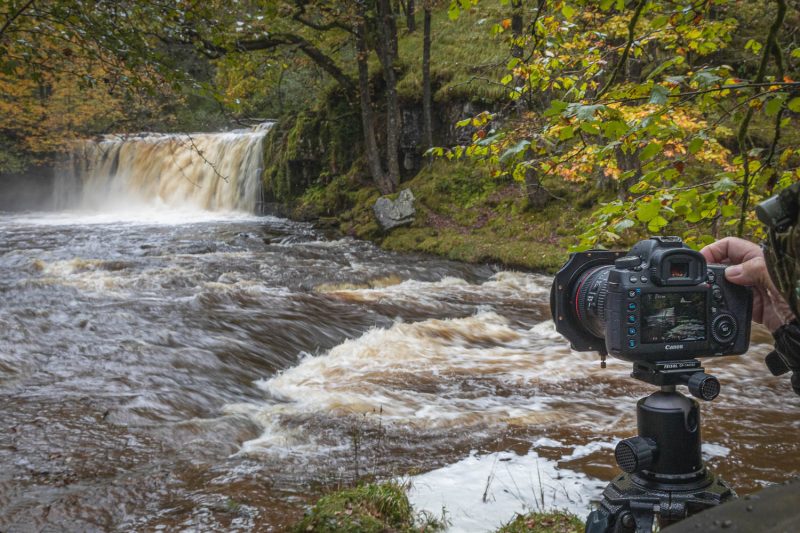
Be sure to use a good, sturdy tripod for all your waterfall images. Not only will it provide a solid base if we later decide to use a long exposure (slow shutter speed), but it will also slow you down. This allows time to frame your images correctly and with precision.
Camera settings for photographing waterfalls
1. Image aesthetics
The main thing you can alter in any waterfall photo is how the water appears, and the only controlling factor for this is shutter speed.
This could be using a fast shutter speed to freeze splashes, or a long shutter speed to blur any movement. There is no firm rule here when it comes to the perfect shutter speed, and it is totally down to how much water there is in the scene, how fast it is moving on the day, and also – more importantly – how you want it to look.
Experiment with your shutter speed to create your desired effect. Other settings, such as aperture and ISO, will help balance the exposure and determine what shutter speeds you can use with the given ambient light.
2. Aperture and ISO
Put your ISO as low as it can go to start with – usually around 100 is a good starting point. We do this for maximum quality and, in most cases, capture the full dynamic range of the sensor at this value.
Use a narrow aperture (high f-number) to give you a large depth of field, then focus roughly a third into the scene for good front-to-back sharpness.
Read more: Where to Focus in a Landscape Photo
Dropping the ISO and narrowing the aperture will also reduce the amount of light entering your sensor. In turn, this will slow your shutter speed enough to, hopefully, blur the water.
3. Neutral density filters
Slotting or screwing in a neutral density (ND) filter will help to block light intake, thus extending the shutter speed. These are the easiest way to obtain any shutter speed you wish, and these filters come in different options of density strengths known as stops.
The most popular choice of ND I would recommend for waterfalls is a 3-stop (0.9) ND filter, although you can get much higher versions right up to the 10-stop (3.0) filters that will allow you to shoot well over thirty second exposures in the midday sun.
However, for most scenarios I use a 6-stop (1.8) filter, which should give you a 20-30 second shutter speed in brighter conditions.
Remember, with waterfalls the longer the shutter speed, the more blurred or ‘milky’ the water can look. Use too long a shutter speed and the water starts to lose its energy and appeal. Conversely, a shutter speed too short and the water can become ‘messy’ – so there is a real happy medium. This is all totally subjective though, so play around and experiment for your desired effect and find what you like.
Also, keep in mind that water falling naturally causes localised breezes and wind near its base. Consequently, if you have a plant or flower as your foreground subject, then the slightest movement will cause it to blur throughout the exposure. Take this into account when choosing your shutter speeds.
4. Polarising filters
If I could have only one filter in my camera bag it would be one of these. A real firm favourite of mine is a circular polarising filter, especially when there is a waterfall in the frame. Used in front of the lens and rotating for best effect, they can cut down any surface reflections and boost natural colours.
Read more: What are the Best Filters for Landscape Photography?
A polariser reduces reflected glare from wet rocks, shiny leaves, and water highlights. It also increases colour saturation. They also act like a neutral density filter, blocking the incoming light by 1-2 stops and hence increasing shutter speed length to blur any water movement.
Sometimes a polariser is the only filter needed when photographing waterfalls. Put one of these on first without any ND filters to see if it provides the desired shutter speeds.
Waterfall photography checklist
- Using a sturdy tripod for long exposure photography is essential
- Use a cable release/self-timer to reduce camera shake
- Use Manual mode
- Set your camera to ISO 100
- Compose your shot then without filters on (you will not be able to focus effectively through the viewfinder with a heavy ND filter in place)
- Choose the aperture and then set the focus point
- Attach your polarising filter and rotate for best effect
- Set the shutter speed so it is a balanced exposure – use the histogram to help
- Take a photo as a test shot to check the composition and exposure length
- Change your shutter speed to get the desired effect you are after. If requiring a longer shutter speed, attach your chosen ND filter
- Take your photograph and review the results
- Always use the histogram while reviewing images to check for blown out highlights. You want the histogram limit to be right on the edge of clipping the brightest white on the waterfall. There will be some room for highlight recovery if shooting raw
- I also find it useful to use Live View or an EVF to help ‘see’ through more dense ND filters – speeding up operational time, aiding composition, and gauging exposure accuracy
- Always check your lens and filters for waterfall spray, wiping between shots
In conclusion
Photographing waterfalls can be challenging. Not only are we photographing something that is always changing, but the fact you need to approach them with care and respect should instil some caution.
It’s also hard to envisage the desired effect of how shutter speeds will affect the water in a scene until you’ve taken it, but with plenty of practice and help from pointers in this article, you should be well on your way to taking compelling and interesting waterfall images.


