How to Covert Time-lapses into Long Exposure Photos
Whether it’s a reckless ocean transformed to a smooth blanket of blue, or rolling clouds turned into beautiful streams of silky-white, long exposures are a fantastic landscape photography staple. But if you missed the chance to capture one whilst on location, then this tutorial by photographer Joshua Cripps provides a quick solution for converting time-lapses into jaw-dropping long exposures.
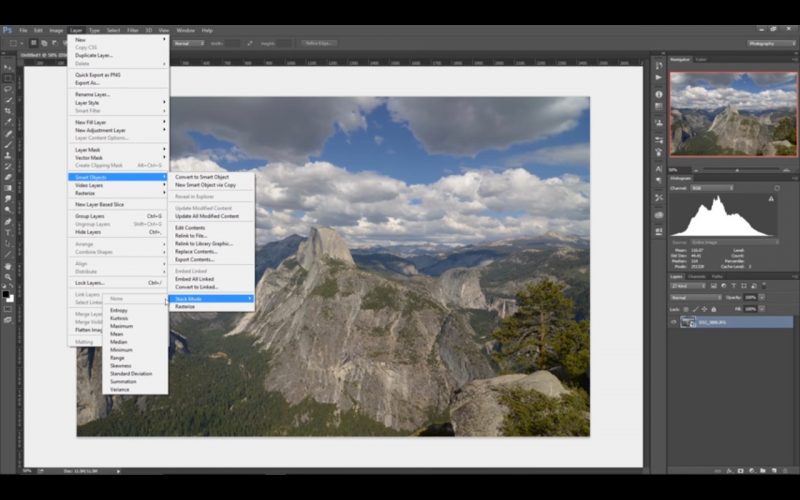
As shown in the video, Cripps shot a time-lapse in Yosemite and with a few tweaks, and then turned it into a “simulated long exposure” of 14 minutes in length. The finished photo is in fact a composition of 263 individual photos, taken from the time-lapse and merged together to create the long exposure.
If you want to give it a go, then you’ll need all the separate images from the time-lapse. If you’ve lost the files, then they can be extracted using VLC media player.
It is important to note that this method only works for stationary time-lapses, so if the camera has moved on a rail or rotation device then this technique is no good.
Once extracted, the frames then need to be averaged (merged) together. Cripps mentions that, in a way, this is what your camera does when taking a long exposure normally.
Firstly, you go into Photoshop and head to “file > scripts > load files into stack”. Secondly, you load them as a stack and navigate to “create smart object > layer > smart object > stack mode > mean”.
It’s as simple as that! Photoshop should create a beautiful long exposure for you to enjoy. Keep in mind that the larger the files, the longer it will take for PS to create the image.
Cripps advises you to not use too many frames so to ensure for the best results, and be sure that selected frames are close enough together time-wise, or you’ll get gaps and spaces in the long exposure.


