How to Photograph Brown Hares

There is something about a hare’s outsized ears that makes it incredibly appealing, and they’re always very popular with photographers. Thought to have been introduced into Britain in Roman times, the brown hare is now considered to be naturalised and is an accepted and much-admired mammal of the British countryside.
But despite their relative abundance across Britain, they are not an easy subject to photograph due to their skittish nature and understandable fear of humans. So, what’s the best plan?


Getting to know hares
The first thing to get to grips with when starting a project with any new species is to learn as much as you can about its habitat, behaviour, and seasonal activity.
1. Habitat
Clearly you need to know where to find your subject. With brown hares, most people will have seen them in open farmland where there is a mix of cover and vegetation.
In terms of photography, these open landscapes certainly offer the best chance of success – although brown hares are equally at home in woodland habitats where they often spend a good part of the winter. Consequently, fields bordered by woodland are prime hare habitat.
Read more: Photographing a Species In-depth
2. Timing
Brown hares are superb at hiding, and during large parts of the day they lie low in a ‘form’ – a small depression in the ground (they don’t dig burrows like rabbits). They press their body flat to the ground at any sign of danger, only fleeing at the very last moment if disturbed.
It is at either end of the day when they are usually most active, as well as throughout the night. As such, the best times to be looking for hares is an hour or two either side of sunrise and sunset, although in my experience dawn is often the most productive time for photography.
3. Seasons
As well as the time of day, the season is also important – and we have all heard of “mad march hares”. This is a reference to the frantic nature of the hare breeding season, when the does (females) come into season and are hotly pursued by a gang of bucks. Each one is vying for the doe’s attention and hoping to be “chosen” as a mate.
Breeding can actually take place throughout the spring and summer, but it is most visible during early spring when the vegetation in their courting fields is low and the hares are easily spotted as they race around in a frenzied state of excitement.
The winter is a great time to begin planning to photograph these charismatic mammals. There is time to first do some research and locate a good spot that is quiet, free of dog walkers, and has a good population of hares. Do of course bear in mind that hares are often found on farmland, so you will usually need to seek the landowner’s permission unless you are sticking to a public space such as a footpath or bridleway.
Read more: What’s the Best Portable Wildlife Photography Hide?
Photographing brown hares
Once you have identified a good spot, then it is a case of dedicating some time to the project. Sure, you might be able to quickly bag yourself a few decent images of hares… but if you really want to do the animal justice and build up a varied and creative set of images, then you’ll need to put in the time.
There is no substitute for time spent in the field, and the more you learn about your subject the better equipped you’ll be to put yourself in the right place at the right time. Do this often enough and you’ll be well-rewarded with some fantastic images.
Getting close to hares
My own early attempts at trying to photograph brown hares were largely unsuccessful, mainly as a result of my incompetence in the art of stalking. In my experience, brown hares invariably flee if they spot a human approaching them and so the likelihood of getting close to one is very small if you try to walk directly towards them.
Conversely, if you are hidden from view and/or remain still then it’s possible that a brown hare will approach you very closely indeed. So close at times that I’ve struggled to get the animal’s head in the frame!
Read more: 6 Tips for Better Fieldcraft in Wildlife Photography
If you want to try to successfully stalk hares, then there are a few things to keep in mind.
First, you must spot a hare before it spots you. Once a hare is aware of you then your cover is blown and you’ll never get close enough to secure a useable picture.
The same goes for any other hares that are in the field. You may be approaching a hare that is unaware of your presence, but if other hares see you they’ll run away. This will alert all other hares in the field, which will often stand up on their back legs to have a better look at you and signal the danger.
Ideally, you want all the hares to be in front of you so that you can remain hidden. Because of the open nature of the ground that hares frequent, cover is usually limited or non-existent – but you may be able to make use of a hedgerow or a stone wall, or sometimes it’s possible to utilise the natural undulations of the ground.
I have been able to get very close to hares on a few occasions by laying prone on the ground and inching forward whilst remaining hidden behind a slight rise in the field. This can be excruciatingly slow progress, but it can’t be rushed and you just have to be patient and take your time. But the benefit of this approach is that you will be shooting from a low level, which affords a great perspective.
Moving a tripod forward along with your lens and yourself while remaining low to the ground is hard work, so a better option is to use a bean bag or even just rest the foot of the lens directly on the ground.
There are also ‘ground pods’ available which can be slid quite easily, onto which you either rest the lens or attach a tripod head. A simple DIY option is to use a small baking tray to house a bean bag. It’s then quite easy to push the tray along the ground with the bean bag and camera/lens in position, with the bonus that you are ready to shoot once you’re close enough without having to make any sudden movements and blow your cover.
Letting the hares come to you
If stalking is not for you, or it just isn’t working, then a second approach is to identify an area that is often frequented by hares. They also use regular tracks to move between areas, so stake this out early or late in the day when hares are most active.
This is a lot easier than stalking, but does require strong willpower to wait patiently for long periods, resisting the temptation to move. However, chances improve over time once you’ve established favoured spots that hares like to frequent.
They are creatures of habit, and knowing where they’ll be at any given time will increase your odds of success. As with stalking, be aware of the wind direction as hares have a keen sense of smell and hearing, so you’ll need to approach or be positioned with the wind in your face.
For both stalking and stake outs, wear clothes that don’t have strong odours, are subtle / dark in colour to blend with your surroundings, and don’t make a noise every time you move.
Many synthetic jackets and trousers are very noisy, so wear soft fabrics that keep unwanted noises to a minimum. If you want to go the whole hog – and many mammal photographers swear by them – wear a stalker’s ‘ghillie suit’. This an oversized camouflaged onesie, which you would be arrested for wearing in the high street, but works well when you’re trying to blend into the edge of a field.
Using a car as a portable hide
A third, much-easier but arguably less-rewarding approach, is to drive around country lanes searching for hares from the comfort of a warm car. This is certainly appealing and it does work, but relies on finding a hare that is unperturbed by vehicles and will allow a close approach.
I’ve found this method to work early in the morning before other vehicles have disturbed them. Some hares can be remarkably confiding and, on occasions, I have enjoyed an hour or more watching and photographing a hare quietly going about its business, totally unperturbed by the presence of a steel box containing a telephoto-wielding photographer just a few metres away.
Of course there are traffic hazards to consider as well with this approach, so this is only something you should be attempting on quiet stretches of road when there are very few other vehicles around and where you can pull off the main highway and park safely without causing any issues for other drivers or endangering yourself.
For these reasons, this is something I usually do on summer mornings before 07:00 on local roads or tracks where I know the likelihood of encountering other vehicles will be very low.
Recommended equipment
However you choose to photograph brown hares, you’ll need the right kit and, whilst pretty much any camera will do the job, there are few things to consider.
A quiet or silent shutter is a real bonus for wildlife photography and is a great feature of mirrorless cameras. If your camera has a motor drive (most do these days), then set this to high speed so that you are ready to capture any action that may ensue.
Most people use autofocus, which I’d recommend, but do make sure that you focus on the eyes of the animal and if necessary move the focus point so that it aligns with the hare’s eye for your chosen composition. Alternatively, you can focus on the eye and then lock focus, allowing you to quickly recompose and hold focus on the eye.
Read more: Back Button Focus – When and Why to Use It
As with most wildlife, a telephoto lens is pretty much essential for close-up portraits and action shots. I would recommend 300mm (full frame) or equivalent if using a cropped sensor as a minimum focal length.
Shooting low to the ground with a telephoto will create some really attractive out of focus backgrounds as well as foreground ‘mush’ if that is your thing, especially when shooting with a wide aperture of f/4 or f/5.6.
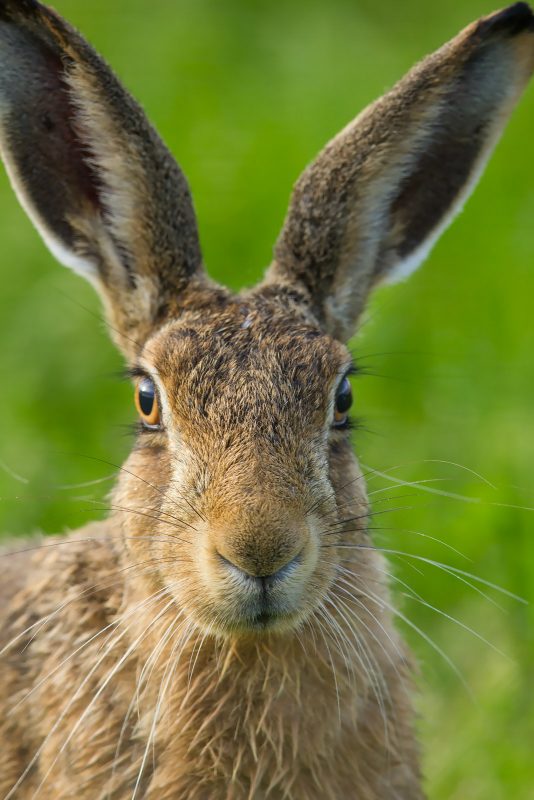
For closer portraits, you may need to stop the lens down (reduce the aperture) to f/8 or even f/11 to bring the whole of the animal’s head into focus. Hares have a long face, so there is a quite a distance between the tip of the nose and the ears when it’s facing you. A smaller aperture will increase the depth of field and bring these features into focus when focusing on the eyes.
Composition
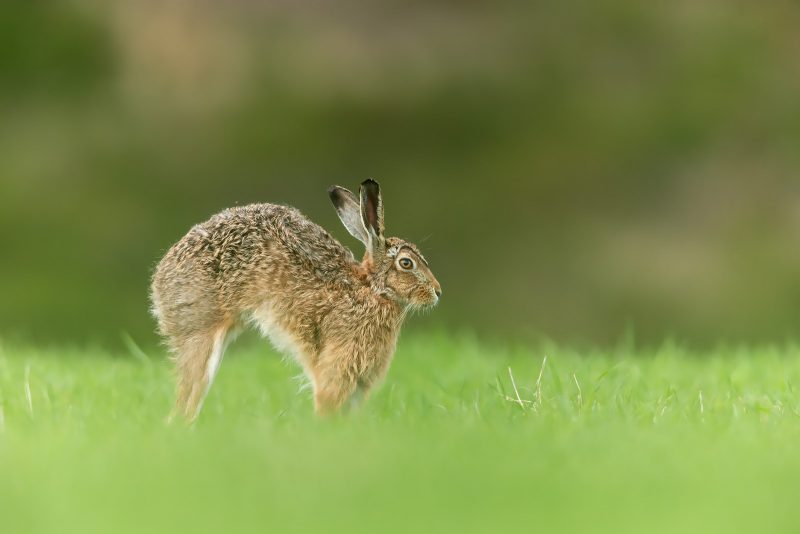
It’s not all about “big in the frame” portraits though, so when the surroundings or lighting conditions are suitable try experimenting with different styles of images, with the hare placed off to one side small in the frame.
Because of their distinctive shape and large ears, they are instantly recognisable even when very small in the frame and will attract the viewer’s attention. Simple compositions work well with this approach and maintain the hare as the main point of interest, using the surroundings to add an additional element to the picture and convey a sense of the animal’s habitat.
In conclusion
With spring’s “mad” season fast approaching, now is the time to be heading onto your local patch in search of one of Britain’s most photogenic animals.
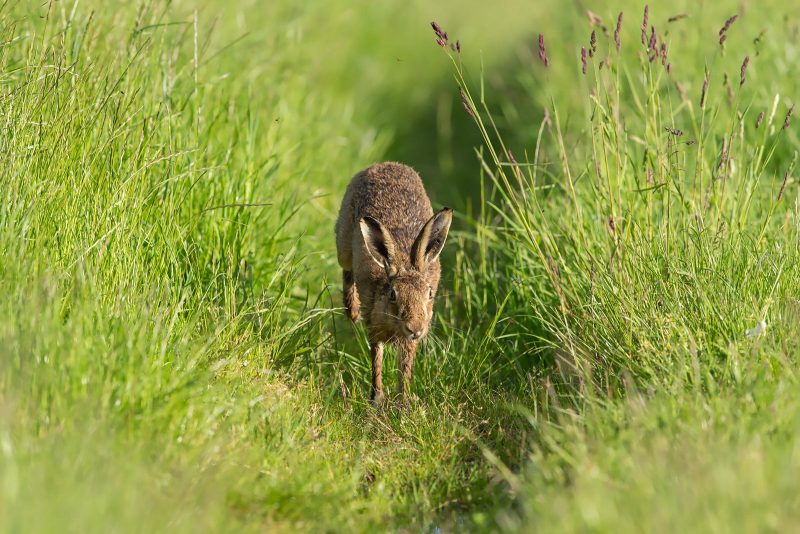
Once you’ve had your first sight of a hare looming large in the viewfinder as it bounds down a track towards you, your heart beating fast as it approaches, you’ll have all the incentive you need to keep returning in your quest for another fix and the holy grail of brown hare photography: boxing.
This behaviour of a female ‘boxing’ a male suitor is one of the most iconic activities in the British countryside and is reason enough to make those early starts in spring in search of the ultimate shot, which for me would be boxing hares backlit at sunrise with dew drops flying in all directions.
I have it in my mind’s eye, just not in the camera yet. Perhaps you’ll beat me to it. Good luck!


