How to Use Foreground for Better Star Photos

Astrophotography is a wonderful thing. One of the best things about landscape photography is experiencing the raw, natural beauty of our amazing planet. Those of us who continue to shoot as the curtain of night begins to fall get to expand those natural encounters into the depths of the universe.
The way our modern cameras capture the stars is nothing short of mesmerizing, and the continuing improvement in high ISO performance means the back of our camera displays much more drama than we can see with the naked eye.


For those new to night photography, the excitement of being able to capture a beautiful sea of stars in such a compelling manner is more than enough to make an evening of astrophotography completely satisfying. Once you master the basic settings for star photography, capturing the night sky becomes relatively simple.
A quick search online will show an unlimited number of Milky Way and starry night images. If you look a little bit more closely, you will discover that the images that are the most compelling are not just about the stars themselves. They contain a composition that cohesively combines the night sky with interesting landscape elements.
Finding a solid foreground is the most effective way to elevate those standard star shots to real works of art.
Plan with precision
As with any landscape photography outing, good planning will pay huge dividends in the final image results. Luckily, we live in a magical age where there are any number of sky and star planning phone apps. Some of these, such as TPE 3D and PhotoPills, provide a virtual reality display of what the night sky will look like over the very landscape you are presently scouting.
By knowing when and where the celestial elements will appear in the frame once the sun sets, you can look for an interesting landscape composition while it is still light enough to see.
Choosing a specific foreground for your star photography isn’t that much different than selecting one for a sunset or sunrise once you know where the night elements will line up in the frame.
Read more: Using Foreground to Create Depth
Quality counts
From a technical perspective, shooting at the widest focal length with your widest lens will allow for better quality night images. The rule of 500 allows you to compute how long your exposure can be without the stars starting to trail. The wider you go with your focal length, the longer your exposure can be. This longer exposure allows for lower ISO and therefore less noise, or you can keep your ISO high and capture more stars.
As with daytime landscapes, getting close to a great foreground element with a wide-angle lens can create a wonderful exaggerated perspective. This presents a unique view of what might be an otherwise mundane subject.
Often, when employing this technique during the day, we can get away with shooting at smaller apertures (f/16 for example) to keep the entire frame in focus in one shot. For star photography, this same foreground will be a bit more problematic, and we will have some decisions to make.
Typically in star photography, we will be shooting at the largest aperture that our lens is capable of. This allows the maximum amount of light in for a given ISO and shutter speed, thus capturing the most stars. At f/2.8, for example, it will be impossible to keep any reasonably close foreground element and the stars in focus at the same time.
There are two basic methods to explore to solve this issue, and both will involve some time in Photoshop or some other editing software:
1. Blend it like Beckham
My preferred method for getting around this technological hurdle is to employ what I call Twilight Blending. In essence, you will find your composition for the evening, wait for the blue hour to settle in, and then shoot your landscape image before the stars begin to appear. This can then be blended with the image of the stars to create the final frame.
Because the Earth’s rotation does’t affect the landscape, you can shoot at a small enough aperture to keep everything in focus whilst leaving the shutter open as long as necessary.
Sometimes I am measuring these exposures in minutes, as I want to take the foreground image in as close to the same light conditions as I will shoot the stars as possible. That way the colors, luminosity, and contrast will be easier to match with the star file.
Another advantage to this technique is the ability to use a very low ISO setting for the land file, which allows for a nice clean foreground file with very low noise.
2. Focus stacking
The second option is particularly effective if the night has already settled in and it is too dark to exposure the foreground properly. In this case, shooting wide open (f/2.8, f/4, etc) might be the only viable option. Obviously, this makes depth of field a big challenge, so plan and execute a focus stack.
It will take a number of frames with difference focal points to get everything sharp, but Photoshop does a good job of combining the files provided that things in the foreground aren’t moving.
The more the subject moves, the earlier you need to shoot the foreground, even when focus stacking. This will allow enough light to account for the shorter shutter speeds required to keep your foreground subject still.
Luckily, modern cameras often have a setting which allows for automatic focus stacking. You can select the menu, choose the number of frames that you want to shoot and the focus interval, and let it do its thing. Even with this methodology it may be challenging to get much detail in the landscape portion of the image.
The ideal sky for Milky Way and/or star shooting is dark and moonless. Therefore, when selecting your foreground composition, it will behoove you to consider the shapes of all the element, so that if they are all dark and shadowed, you can still have a pleasing composition.
Read more: How to Stack Star Photos to Reduce Noise in Photoshop
The single shot
Although the highest quality is usually achieved by blending your foreground file with your star file, today’s DSLR and mirrorless cameras do an amazing job in low light. Taking advantage of these improvements allows you to capture your images in one shot if you so desire.
Certain publications and contests forbid multiple images to be pieced together, so it’s good to keep in mind that there are still options for night photography in those instances.
In such circumstances, you will need to consider your foreground carefully in order to keep everything in focus. Having the lens wide open or relatively wide open will require you to keep tabs on the hyperfocal distance, and make sure to have all the elements far enough from the lens to allow for everything to be sharp.
Remember that calling something a “foreground” doesn’t necessarily mean it needs to be close to you, just that it’s the closest object in your frame. You can still construct an image with a foreground, mid ground, and background while everything is relatively far off.
Read more: Where to Focus in a Landscape Photo
Light it up
Often, astrophotographers avoid the Moon like the plague. There is, of course, some good merit to this philosophy, particularly if you are a Milky Way shooter. But it’s a big sky, and there are lots of different opportunities to make a compelling image even when it’s not completely clear and dark.
In fact, the Moon can be an effective partner when trying to include a foreground in your star images. Having some ambient light, albeit dim, can be enough to give you detail in every area of your images. As an added bonus, high wispy clouds will positively glow when they catch some moonlight, and can become an additional pleasing element in your shots.
Read more: How to Photograph the Moon – An In-depth Guide
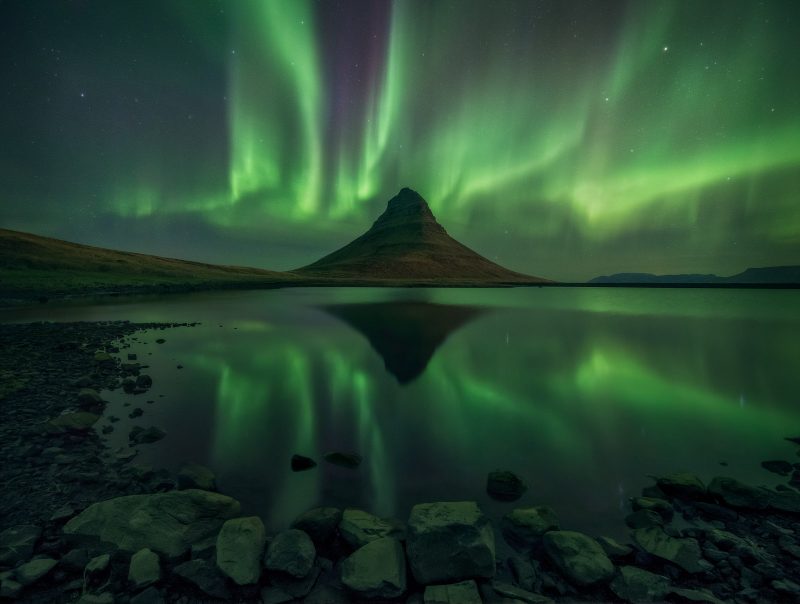
Expanding on that idea, there are alternate light sources that can help to add some pizazz to your star shots. The aurora borealis casts an ethereal green glow on the foreground when it is bright enough. This allows for further compositional options that would be totally impossible with nothing but the dim light of the stars.
A word of caution… You can be so mesmerized by the northern lights dancing above that the excitement of witnessing and shooting the aurora overwhelms you, and you forget about everything but the sky. Ask me how I know. After my first couple of experiences, I realized that I needed to stretch my creativity and try to find a cohesive foreground. The simple act of putting together an actual composition is enough to set your images apart from the majority of aurora shots.
Read more: Optical Phenomena at Night – Halos, Coronas, Moonbows
Light painting
“Yeah, that’s great”, you might say, “but I don’t exactly have easy access to the northern lights every evening”. Fair point!
You do, however, have access to a flashlight. Light painting your foreground subject is a wonderful way to add interest and make your star images more dynamic. Any light source will work, depending on the brightness and color you desire.
If you are planning to light paint your foreground, consider the direction of your light source. Your intuition might be to just stand by your camera and paint the light back and forth across your subject. But remember to treat your light source as you would the sun (or the Moon!). The decision to have your foreground side lit, front lit, or backlit should be a conscious one, as each option will deliver a different “feel”. For example, a side lit scene has a lot more depth than one where the light source is straight on.
Find a frame
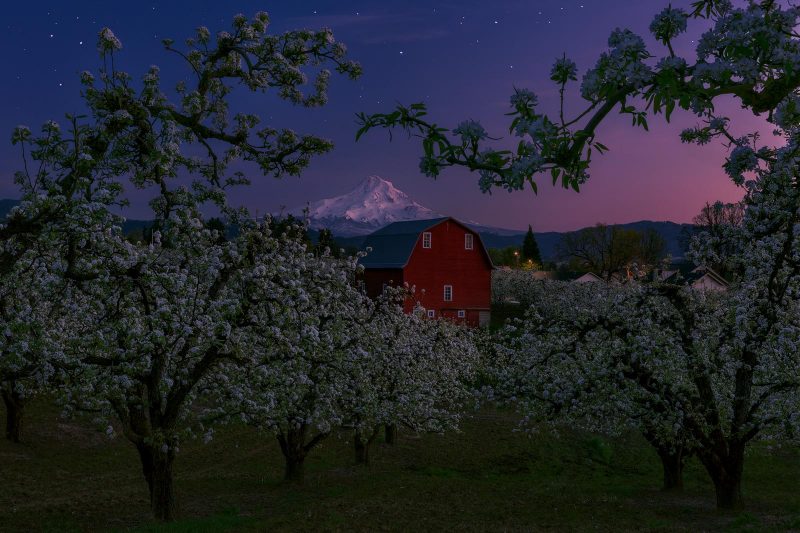
Finally, don’t be afraid to use a foreground element as a frame in your composition. If you start by coming up with a nice arrangement of elements for your daytime landscape images, you will find that there is a good chance they will work at night as well.
Don’t be afraid to get low to change the typical perspective of a scene. Deciding to shoot the stars instead of a sunset or sunrise can bring a fresh look to an otherwise ordinary or iconic scene.
Read more: How to Frame Your Landscape Photos
In conclusion
Night photography can be one of the most enjoyable experiences we have as landscape photographers. There is so much to see when the darkness settles in and the universe reveals itself. The hard part is conveying that sense of mystery and wonder to your viewer.
Try to find an interesting foreground and work it into an excellent composition. You will instantly elevate your images to an entirely new level of art.
Don’t worry if the techniques described in this article require a little practice to perfect. You’ll almost assuredly enjoy the process. Just don’t forget to occasionally look up from your camera and enjoy the vast infinity above you.
Read more: The Ultimate Guide to Astrophotography


