How to Create a Simple Time-lapse
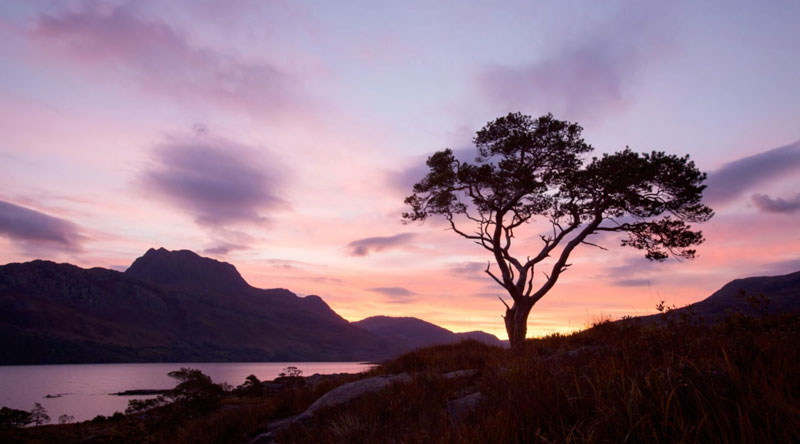
The basic idea of a time-lapse is to capture a sequence of still images taken at regular intervals over a period of time, which are then used to create a movie where time moves faster than reality. Time-lapse is a great way to animate a subject but unlike video, which is capturing moving footage in real time, a time-lapse is capturing movement over a much longer period because there is an interval between each frame. This means that several minutes, hours or even days of action can be condensed into just a few seconds of movie. The technique is effective for slow moving action such as clouds scudding across a landscape or a flower opening, because it creates the effect of speeding everything up so that movement is more pronounced. It is therefore the perfect technique to use as a way of capturing events that unfold slowly – something that cannot be achieved with (real-time) video.

Step 1: Essential kit
Other than a camera and lens, the only equipment that you need to create a time-lapse is a solid tripod to keep the camera completely stationary and an intervalometer, which is a device that enables you to accurately set the duration of the interval between frames. Intervalometers, such as Canon’s TC-80N3, are often multi-functional devices that also serve as a remote release and bulb timer for long exposures, so they come in handy for other aspects of photography as well. Many of the latest Nikon DSLR cameras have a built-in intervalometer, which is more convenient and means that you always have it with you. They are also available from independent manufacturers such as Hama, which do the same job at a fraction of the cost. These independent intervalometers have connection cables that fit most modern digital cameras, so it’s simply a case of buying the appropriate cable when you purchase the device.
Step 2: Choose a suitable subject
Time-lapse is most often used to capture landscapes where there is some form of movement or change occurring. The movement of clouds is perhaps the most obvious. Fast-moving clouds will produce a dramatic time-lapse sequence, especially if the clouds are moving directly towards the camera, but sideways movement is also very effective. Sunrise and sunset time-lapse sequences are great for capturing the changing colours of the sky and clouds. Moving water makes a good subject too. The rise and fall of the tide is particularly effective as the water creeps up and engulfs the land or, conversely, subsides to reveal it. At night, the movement of stars can also be recorded using time-lapse, and if you live in far northern locations the aurora borealis is a spectacular subject for this treatment.

Time-lapse is a wonderful way to reveal very subtle changes and movements in the natural world as well. Flowers opening in the morning sun; sunlight and shadows moving through a woodland; frost forming and melting, or the accumulation of snow may occur over a time frame of an hour or so. A leaf opening or a flower emerging from a bud may takes several day, but it can still be recorded using time-lapse to reveal these fascinating events in just a few seconds of a movie. Although a little more difficult to execute, time-lapse is also used for slow moving wildlife subjects, such as the emergence of a butterfly for example. There are really no limits to what you can shoot and there is a degree of trial and error involved as you learn what works and what doesn’t. In addition, some events don’t unfold the way you hoped or move in a different direction, thereby ruining the time-lapse. This is a natural hazard of working with this technique, but it’s easy enough to cut the sequence short, delete the files and start again!
Step 3: Set the interval
The interval between frames can be anything from 1 second to several hours, and this can be set on the intervalometer so that the timed intervals are consistent – a requirement to produce a smooth time-lapse. The duration of the interval is determined by the speed of movement and/or change that you are recording, the length of time over which you want to capture the time lapse sequence, and the duration of the final time-lapse movie.
The frame rate of standard video (in the UK) is 25 frames per second. This means that when producing a time-lapse movie you need to capture 25 frames to produce 1 second of finished video. Therefore, 250 frames are required to produce a 10 second time-lapse. If the event you are recording takes place over 20 minutes then this will equate to an interval of 4.8 seconds between frames. i.e. 20 x 60 = 1200 seconds divided by 250. You would then use the nearest whole number i.e. an interval of 5 seconds and run the sequence for a little over 20 minutes. For an event that unfolds over 2 hours the interval would be 2 x 60 x 60 = 7200 ÷ 250 = 28.8 second interval, rounded up to 29.
Is the maths too complicated? Then try using this interval calculator.
This methodology works quite well but it doesn’t take into account the speed of movement of the subject. For example, the interval should be much shorter for fast moving clouds compared to slow moving ones, otherwise a lot of the action won’t be recorded and the resulting time lapse will appear quite jerky. I would typically set an interval of around 4-6 seconds for moving clouds, but reduce this interval to perhaps only 2 seconds if the clouds are moving very quickly. Conversely, if there is very little movement, the interval would be best extended to 8-10 seconds. There is therefore a judgement call to be made when assessing the situation and setting an appropriate interval to give the best result. This becomes more intuitive with practice and having evaluated your previous results.
Step 4: Set the number of frames
As discussed above, the number of frames taken will determine the overall length of the finished time-lapse. This can be any length you wish but somewhere between 5-20 seconds is about right, unless there is a good reason for extending it. Any less than 5 seconds means the time-lapse is too short and loses impact. On the intervalometer I use, the number of frames can be set as 99, 199, 299 etc. and so I usually set this to 299 which equates to a fraction under 12 seconds of time-lapse. This allows some leeway should I want to trim the movie, and also provides a lead in and lead out of the time-lapse – handy if it is going to be incorporated into a film or presentation. In situations when the movement or ‘action’ is less predictable, then it can be useful to run the time-lapse for much longer in the hope of capturing the best period of action. The frames at the beginning and/or end of the sequence can then be discarded if necessary so that only the most interesting part is used to produce the time-lapse. Similarly, if you have set the number of frames to 399, for example, and the best of the action has passed, then the sequence can easily be stopped manually before this number of frames has been captured.
Step 5: JPEG or Raw
The easiest way to generate the images for a time-lapse is to shoot in JPEG format, as these require smaller memory cards and no post-processing. Since the finished time lapse movie will usually be the same dimensions as standard 1080p video (i.e. 1920 pixels wide) then on the face of it there is no need to produce larger files than this. So you could use a small or medium JPEG setting, as long as it is larger than 1920 pixels wide. However, shooting a larger file size means that you can crop the image as necessary to improve the composition. This can be useful if, for example, you’re not exactly sure where the action will unfold in the frame. Composing a wider shot provides a better chance to capture the best action, but it may mean the composition needs to be cropped before producing the time lapse movie. A larger file size allows for this.
While JPEGs are a quick and convenient way to generate the necessary frames, it doesn’t allow for any post-processing of the images in the same way as Raw. Therefore, it may be more difficult to adjust things like exposure, highlights and shadows should this be required. The result being that your time-lapse may not be as good as it could be had you shot it in Raw and optimally processed the images yourself. This isn’t as arduous a task as you may imagine since any alterations need only be made to one image and then these can be applied to all the other images by syncing the settings – in Lightroom or Adobe Camera Raw for example. One disadvantage of shooting in Raw format is the size of the captured files, which has implications for the size of memory card you use as well as storage facilities on your computer’s hard drive. However, memory is cheap these days and once the time-lapse has been produced you can delete the Raw files should you wish to free up space on your hard drive.
Another option is to shoot Raw + JPEG and only use the Raw files should the images require more processing. If the JPEGs can be used straight out of the camera then this speeds up the process and the Raw files can be discarded.
Step 6: Exposure settings
Fluctuations in exposure from frame to frame results in flicker and whilst there is now software available to reduce or eliminate this it is advisable to use Manual exposure mode whenever practical so that the exposure remains constant. Determine the correct or best exposure (by metering from a mid-tone for example) and then set these values manually using an appropriate aperture to ensure sufficient depth of field for the subject you are photographing. The actual shutter speed is less important as it’s not necessary to arrest movement in most situations. Therefore you can use a low ISO setting such as 100 to maximise image quality.
There are a few things to consider in regard to shutter speed when shooting time lapse. Firstly, and very obviously, the shutter speed must be faster than the duration of the interval! i.e. if the interval is only 2 seconds then the shutter speed must be 1.6 seconds or faster. This is also relevant if using the 2 second self-timer to activate the shutter since this also needs to be taken into account. A slow shutter speed is however, often desirable because this means that you are able to capture a longer slice of the ‘action’ between each interval. For example if the interval is 5 seconds and the exposure time is 3 seconds then you only actually have a 2 second gap between each frame i.e. 3/5ths of the action has been captured. Conversely if the shutter speed is 1/60th second then the gap is almost 5 seconds and the resulting time lapse can appear jerky. Using a slower shutter speed therefore smoothes out the time lapse and makes the movement / action appear more continuous. If necessary fit a neutral density filter to increase the exposure time. A long exposure isn’t desirable for all time lapse subjects though, and so again you need to exercise your own judgement.

In situations where light levels are changing quickly such as at sunrise/set, the exposure at the start of the sequence may be radically different from that required towards the end, resulting in a time lapse that becomes very light or very dark as it progresses. Setting the cameras to aperture priority (Av) means that the exposure will automatically be adjusted as the light levels change so that the exposure is correct for each frame thereby producing a time lapse that is illuminated evenly throughout. A problem with using Av, is that frame by frame variations in lighting or in exposure lead to perceptible brightness fluctuations, or flicker which is very evident in the time lapse movie. This can removed however, using appropriate software such as GBDeflicker.
Step 7: Other settings
The golden rule for time-lapse is to maintain consistency from frame to frame. Therefore, set the white balance manually using a Kelvin colour temperature setting to suit the lighting. Typically somewhere between 5400-6500K is suitable for most daylight situations. You can always check how this looks on the LCD after taking a trial shot. This can also be set during processing if you’re shooting Raw.
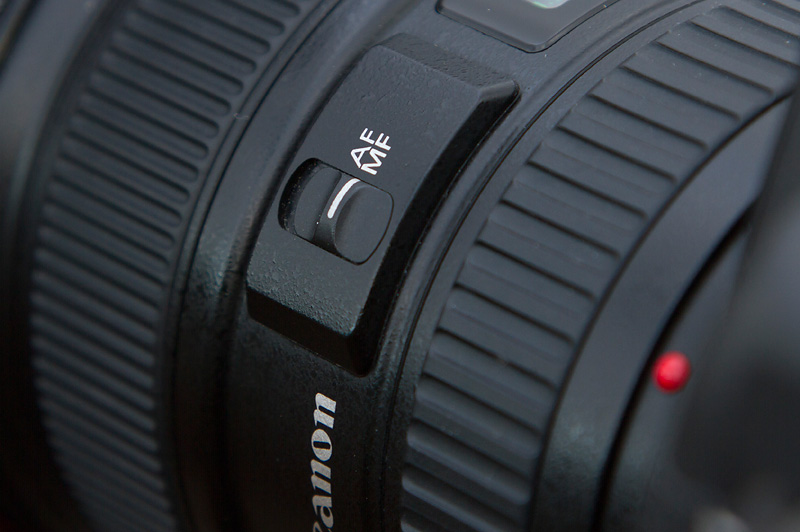
Focusing should also be done manually, since you don’t want the camera to try to autofocus each frame. It’s easy enough to autofocus the camera initially and then switch to manual focus (MF) on the lens barrel before beginning the sequence. It is very important you remember this.
Step 8: Download the images
Having captured the sequence of pre-determined frames in-camera, download them onto your computer as usual. If the images have been shot on a memory card that also contains other images, then you’ll first need to move the sequence of images to a separate named folder. You will also need to make sure that the images are in the correct order – they should be already, but if your camera file numbering system has changed e.g. from 999 to 001 during the capture sequence this will affect the running order and you’ll need to rename the files so that they are ordered sequentially. It is not a bad idea to do this anyway so that the images are named 001 to 299 or whatever your end number is. Applications such as Adobe Lightroom can help you here.
Step 9: Processing and resizing
If you have shot in JPEG format you can skip this first part, otherwise import the renamed images into Lightroom, ACR or other software that allows batch processing. Choose an image to work on – this can be the first in the sequence or perhaps one half way through and process this as you would do normally, making any necessary adjustments and enhancements. Once you are happy with the result then simply select all the images and Sync these changes. The image can also be cropped at this stage should you wish to do so and again this would be applied to all images. Now export the images as JPEGs at a resolution of 1920 pixel wide to a new named folder.
If you shot in JPEG format then you’ll still need to resize the images to 1920 pixels wide. This can be done in Lightroom or in Photoshop using File>Automate>Fit Image and set this to 1920px by 1080px. If you create an Action for this you can then batch re-size the images using File>Automate>Batch and apply the Action to the folder of original JPEG images.
Step 10: Create the time-lapse video
There is various software available for creating time lapse movies, but if you already own one of the extended versions of Photoshop then this is easiest way to do it initially. Should you wish to expand your horizons in the future then you may want to look at other software such as MPEG Streamclip or LRTimelapse.
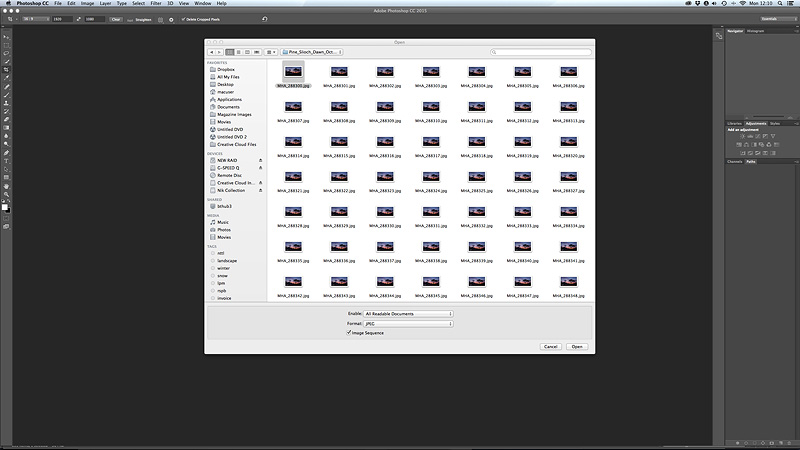
In Photoshop go to File>Open and locate the named folder containing the sequence of resized images. Highlight the first image in the sequence and tick (check) ‘Image Sequence’ at the bottom of the dialogue box. The next dialog box asks you to specify a frame rate – either 24, 25 or 30 (most commonly 25 is chosen). The time-lapse movie will then be created and displayed on screen. You can use the Animation panel under the image to play the movie and check that you’re happy with it. You can also add an audio track at this stage if you wish.

To create the finished video click File > Export > Render Video. This brings up the message ‘Initializing Video Export’ and then a ‘Render Video’ dialogue box (see above). Here you can name the video and select a folder to send it to. Choose the format – H.264 (mp4) or Quicktime (mov) as well as the quality setting and size depending on where you want to show the movie (e.g broadcast TV, tablet or YouTube). After choosing the appropriate settings, hit the Render button to export the video. The resulting movie can then be played or uploaded as required.


