How to Photograph Great Gray Owls

Great gray owl photography has always been of interest to many wildlife photographers. And if there’s any species that knows the mysteries and secrets of the northern forests, it is the great gray owl (Strix nebulosa).
The beauty and grace of the great gray owl only add to its intrigue.


Nicknamed “The Phantom of the North,” fascination with great grays inspires people to see and photograph them in their secretive and wild habitat.
With some understanding of great gray owl range, behaviors, and life cycle, people can improve their chances of seeing one and come away from the experience with beautiful photographs.
Great gray owls
Great gray owls live in the northern forests of North America and Europe. Because they are a sensitive species, exact locations are rarely made public.
However, doing your own research to find places where they have been seen will hopefully steer you to success if you have persistence and some patience.
Great grays spend most of the day deep in the forest. However, in the evening and morning hours, they begin to hunt, and this is when they are most often seen.

They prefer to hunt in small meadows or openings in the forest with many perch locations that are maybe 20 to 50 feet high. They also seem to prefer wet or boggy areas that tend to have more of their favorite food, the vole.
When looking for these owls, scan the trees along the edges of these small meadows, forest openings, and the scattered or isolated trees in less-dense areas along the forest edge.
Train your eye to look for an unusual shape on obvious perches, paying particular attention to the tops of half-broken trees and the lower branches of taller trees in the area.
Great grays are masters of blending in with their environment. Their gray and brownish feathers are the same colors as the bark in a pine forest, so it is important to be able to detect the outline of the owl.

Weather plays a role in their hunting preferences, even though they are comfortable in all types of conditions. They primarily rely on their fantastic hearing to locate prey for a successful hunt.
Windy days make it difficult for them to hear their prey, so they will often refrain from hunting in strong winds to conserve energy for better conditions.
Additionally, great gray owls typically do not fly well when soaked with rain and often avoid hunting in the open during heavy downpours.
Owls can be seen throughout all seasons of the year. However, during winter, great gray owls will often relocate to new areas and somewhat gather at favorite hunting grounds.
This behavior is influenced by factors such as food availability at their home location, snow depth, owl populations, and other climatic conditions.
While this phenomenon occurs only every few years, it’s beneficial to familiarize yourself with these areas and be prepared to travel and photograph the owls when it happens.

If you have chosen a specific area to search for great grays, the most efficient way to find them is by hiring a local wildlife guide. Take time to research local guide companies and identify those with expertise in wildlife photography.
They are likely to have information on recent owl sightings and will understand your specific needs as a wildlife photographer.
Read more: 7 Advanced Techniques to Improve Your Wildlife Photos
Understanding the key characteristics of the great gray owl
I encourage you to learn the characteristics and behaviors of the great gray owl.
Understanding their seasonal movement patterns, hunting preferences, and breeding season activities will help you locate them and significantly increase your chances of capturing natural and artistic images.

As mentioned earlier, great gray owls heavily rely on their hearing to locate and capture their prey.
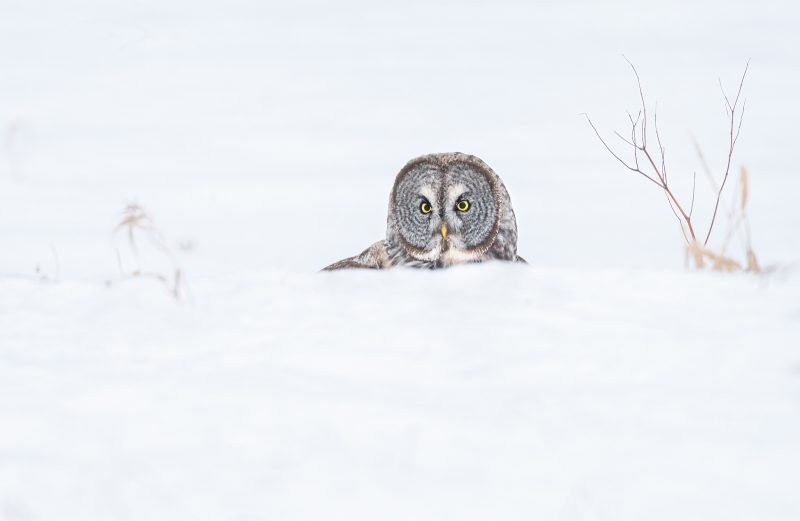
They possess the remarkable ability to hear the slightest rustle of a vole within the grass from distances of 50 to 100 yards, even when their prey is concealed under a foot of snow.
They initiate their hunts from a perch, where they can survey the ground and listen attentively for any signs of their prey. Once a vole is detected, the owl will concentrate its attention on that specific spot until it is ready to take flight.

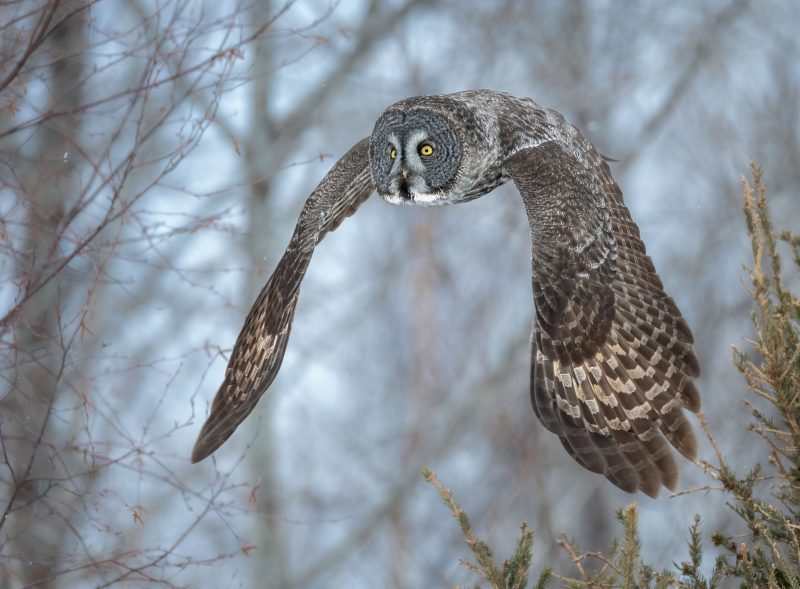
Its long and wide wings enable the owl to slowly circle overhead and even hover over its target, while still listening intently to better pinpoint its location. It will then plunge down toward its prey.
Just before crashing to the ground, it extends its legs forcefully to catch the vole, even plunging deep into the snow if necessary. If successful, the owl will consume the vole whole in one large swallow.
Read more: Photographing a Species In-depth
Photographing great gray owls responsibly
A great gray owl’s sharp hearing is crucial to its survival. Regardless of the distance between people and a great gray owl when viewing or photographing it, everyone should observe and photograph in complete silence.
Talking, rummaging through camera bags, constant movement, slamming car doors, or leaving the car engine running should be avoided. The quieter people are, the more likely the owl will continue hunting and provide fantastic photo opportunities.

While some great gray owls may tolerate human presence to some extent, it is important to avoid getting too close to an owl. Approaching too closely can easily disrupt its hunting behavior and cause the owl to abandon hunting and retreat to the forest.
Maintaining a minimum distance of 75-100 feet from the owl allows it to behave naturally and facilitates capturing great photographs.
If the owl still appears bothered by your presence, it is advisable to move further away. When dealing with nesting owls, even more space and caution are necessary.

The use of call backs (recorded or voice calls) and baiting should be avoided. Call backs can confuse the owl and disrupt its natural behavior.
Baiting, such as using live mice to entice owls to fly towards photographers, artificially attracts owls to humans, potentially leading to an owl’s dependence on people for survival or putting it in harm’s way.
Read more: Ethics in Wildlife Photography – Code of Conduct
Great gray owl portrait photography
Photographic opportunities for great gray owls are generally easiest when they are hunting. This is when they are most visible and provide captivating perspectives for photographers to capture and convey their emotions and intentions.
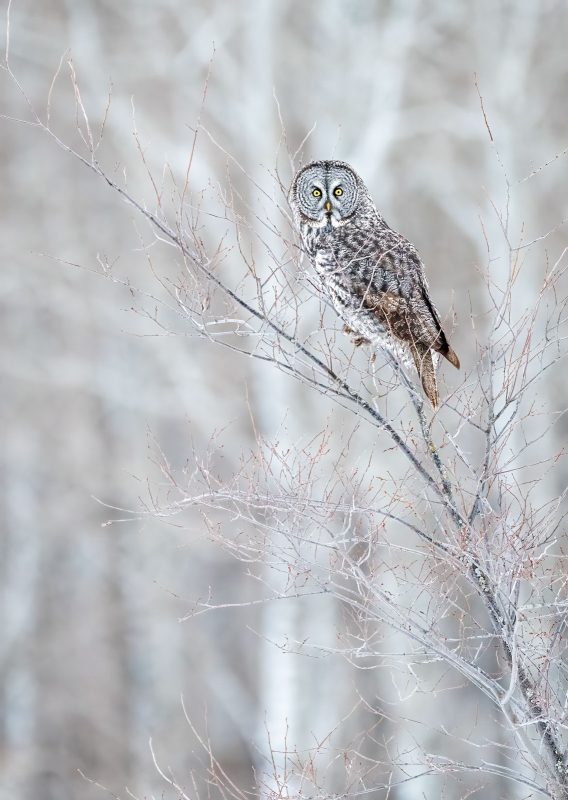
Even when perched on a simple branch, a great gray owl is a beautiful subject to photograph. As they often choose isolated shorter trees as perches while hunting, photographers can capture images with clean and smooth backgrounds.

When you spot an owl, begin by observing its behavior to determine if it is preparing to fly and attack its prey or if it appears settled and is still listening and searching. Assess its perch and consider the background.
If necessary, adjust your position to eliminate any distractions from the frame, such as nearby trees or hillslopes in the background. In cases where there are numerous distractions, try to find an angle that brings clarity to the image amidst the surrounding forest chaos.
This will draw attention to the owl and important secondary elements in the photograph. Take note of any stray branches that might be positioned directly behind the owl and consider changing your location to minimize their distraction.

Experiment with different perspectives to discover which ones offer the most compelling and expressive portrayal of the owl’s thoughts and intentions.
Fortunately, great gray owls hunt during the morning and evening hours when the light is typically optimal.
In the morning, as the sun begins to shine, it is important to minimize any bright spots in the background of your frame. These bright spots can introduce unnecessary distractions and draw attention away from your main subject.
During evenings, when cloud cover is more likely, the soft and diffuse light helps reduce contrast for both the owl and the background.

When owls are perched for hunting, they typically remain on a single perch for 10-15 minutes before moving to a new perch if they can’t detect any prey. This gives you ample time to experiment with different perspectives for your photographs.
Stay prepared to capture unique gestures that the owl may exhibit while listening for prey. They often turn their heads into interesting positions that can effectively communicate the owl’s thoughts during its search for food.
Seek out great gray owls perched near a dark forest and capture the scene to illustrate the story of an owl hunting in its natural habitat.
Positioning relatively light-toned great gray owls as smaller elements within the frame will make them truly stand out against the dark background, resulting in intriguing images.
Read more: Bird Photography Tips – Shooting Bird Portraits
Owls in flight
Once you have captured your perching images of the owl, adjust your camera settings for bird-in-flight photography. Ensure that your camera settings, including shutter speed, aperture, and ISO, are configured to capture sharp images.
If shooting in manual mode, maximize your aperture, set your shutter speed to 1/2500 sec., and adjust your ISO to achieve proper exposure, which may require a relatively high ISO depending on the situation. This should result in sharp photos.

Faster shutter speeds, such as 1/3200 sec., are even better, but make sure your ISO can be increased without introducing excessive digital noise. Most modern cameras can handle high ISOs, so this concern is diminishing as camera technology improves.
Another option is to use manual mode with auto ISO. Set the aperture to its widest setting, choose a shutter speed of 1/2500 sec. or faster, and allow the camera to automatically select the ISO.
This approach eliminates the need for manual ISO adjustments as lighting conditions change.
In either situation, you can decrease the aperture to around f/8 if you require a greater depth of field, provided there is sufficient light to maintain a fast shutter speed. This will help produce relatively sharp images even if the autofocus is not perfect.

Be prepared to track the owl’s flight path from the moment it takes off. While the owl is perched, it may exhibit signs of focusing its attention on a particular area of the ground, indicating that it will likely take off in that direction.
Keep the owl within your frame as it flies, doing your best to maintain its position. The sharpness of your images will depend on your steadiness and your ability to track the owl with your camera.
Great gray owls tend to fly slowly as they pinpoint their prey but make sudden plunges to the ground when they capture it.
Handholding your camera and lens is generally the preferred option, although with heavier lenses, a tripod may be necessary.

Pay attention to the lighting situation, whether you are facing front, side, or backlighting. As the owl hunts in the immediate area, moving from perch to perch, you will likely have opportunities to experiment with different lighting perspectives.
Adjustments in exposure may be required to account for changing brightness and shadows.
You may need to step back from the owl to allow for more flexibility in your panning technique. This will also allow you to compose the owl within the frame. Leave some extra space in front of the owl to create room for it to fly into within the image.

While the owl will fly where it pleases, be mindful of the background and strive to capture images where it is smooth, clean, or provides a dark backdrop that contrasts with the lighter tones of the great gray owl.
Read more: 4 Essential Tips for Photographing Birds in Flight
Equipment
In order to avoid disturbing the owl and disrupting its hunting behavior, it is advisable to use a telephoto lens for photographing owls. As mentioned earlier, getting too close to the owl should be avoided.
For classic portrait images, a lens of at least 400mm is recommended. Alternatively, if you want to capture the owl within its environment, a shorter telephoto lens, such as a 200mm or 70-200mm zoom lens, may be sufficient.
Consider using a tripod in low-light situations, particularly before sunrise and after sunset, or when using a heavy lens. Owls may remain still at times, and a tripod will allow you to use slower shutter speeds in the dim lighting conditions.

Your existing DSLR or mirrorless camera will work fine for photographing owls. Set your camera to a high frame rate to capture sudden movements. Use continuous focusing to increase the chances of achieving a sharp focus on the owl in flight.
By using the widest aperture available on your lens and selecting a sufficiently high ISO (without introducing excessive digital noise), you can achieve a fast enough shutter speed to capture images in low-light situations.
Read more: What are the Best Lenses for Bird Photography?
In conclusion
Cherish your time while photographing great gray owls. Photographing them is often secondary to the amazing experience of being with them in their hunting grounds.
Although they are relatively scarce and hard to find, once you come across a great gray owl, you’ll have some outstanding photographic experiences.
Approaching them with respect for their space and the silence they require will help them provide you with unique photo opportunities.


