How to Photograph Lone Tree Landscapes

It has to be said that, at times, landscape photography can be a ridiculously difficult pastime. It can seem like all the elements are against us and, in the case of the weather, also completely beyond our control.
Then we begin to look at composition: the simple (or not so simple) act of arranging or framing elements within a scene so they naturally compliment each other, thus creating a visually interesting image. Depending on the complexity of the scene we’re photographing, this in itself can be incredibly tricky.


The problem is that, with so much going on, it becomes more and more difficult to see any kind of relationship between different elements, making it harder still to simplify things down into some kind of order within the frame.
For these very reasons, it always feels quite refreshing to come across a scene that is just naturally simple.
Many would argue that they are a total cliché, but there’s something about the solitary tree that really seems to captivate landscape photographers everywhere. Maybe it’s the conceptual ideas that it represents, such as loneliness, solitude, peace, or steadfast strength in adversity.
Or maybe it is just the natural, ordered simplicity that is appealing.
One thing is for sure: the lone tree is a popular subject, and for good reason. There are numerous well-known locations across the UK which draw in photographers from far and wide, week in, week out. Therefore, inspiration is never very hard to find.
Weather conditions
As with most landscape photography situations, there’s no real ‘one size fits all’ set pattern of conditions that works best for photographing lone trees. A lot will depend on what you’re trying to achieve with your images.
However, there are certain weather conditions that might help you simplify a scene.
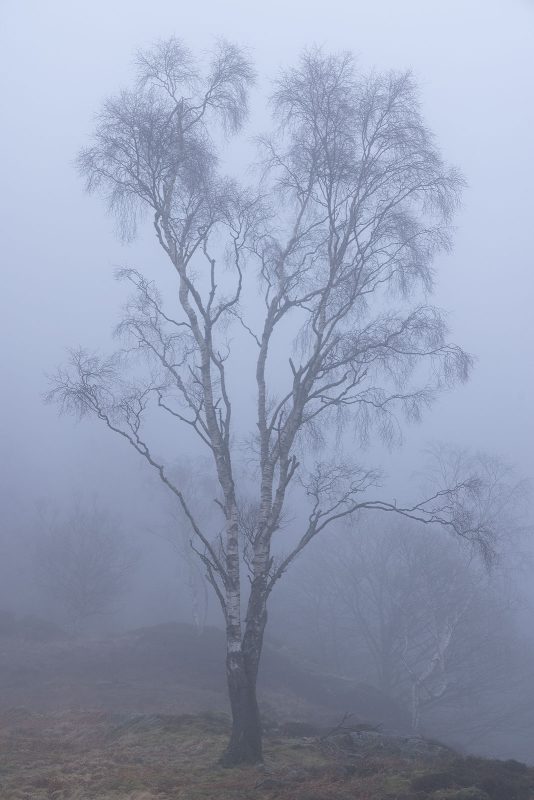
Woodlands, for instance, can be quite cluttered and chaotic, and it can be frustratingly difficult to separate an interesting foreground tree from its background counterparts under ‘normal’ lighting conditions. The arrival of mist however, helps you to ghost out distant trees which would be otherwise distracting, and this helps you to isolate your main subject.
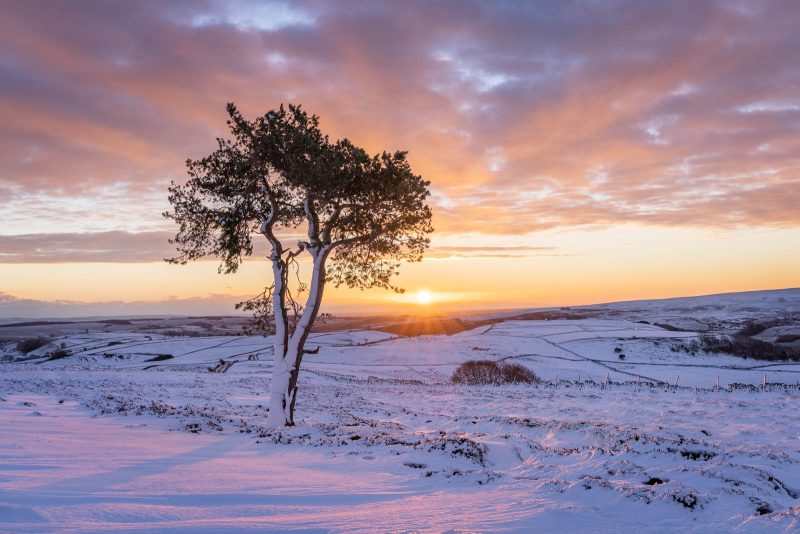
A very simple scene can be even further simplified by the removal (or in this case, partial removal) of colour. We’re not talking about converting an image to black and white (although that might also work as an option), but rather the addition of a covering of snow.
Those overcast winter days, where the sky and land almost blend together as one, can provide the perfect canvas for some very interesting, minimalist images with just the right subject matter. Less is definitely more in this situation.
In the image above, the faint lines of the field and the lack of any other detail created the look of a simple pencil line drawing- in my mind, anyway.
Sunrise and sunset are fairly obvious times for most landscape photography situations, and there’s no reason why we would avoid these times here.
The warm, golden light of the first or last couple of hours of the day can be some of the best, creating lovely warm colours and long shadows across the landscape. Also, if your image is going to include quite a bit of sky, it might as well be a strong one!
Be opportunistic and fluid in your approach. It can be all too easy to head out with a clearly defined idea of the types of images you want to capture. All too often, the prevailing weather won’t particularly suit this approach.
The above image is a recent shot from the Lake District and was completely unplanned. We had hoped to photograph the wider views looking towards the spectacular Langdale Pikes.
However, having made the effort to get up quite high, we never really got the light or conditions we had hoped for. Fog, mist, and rain were blowing through in patches, resulting in reduced visibility and contrast.
This was not especially great for the views of Harrison Stickle in the distance, but it did allow us to isolate one or two lovely areas of silver birch trees, from what would have been a cluttered background under normal lighting conditions.
Read more: How to Take Great Photos When the Weather is Bad
Lenses
Again, there’s no set pattern when it comes to lens focal lengths for photographing lone trees. It will entirely depend on what you’re trying to achieve with your composition.
As standard, a selection of lenses, from ultra and standard wide to short telephoto (16mm – 200mm or full frame equivalent), should cover most situations.
Familiarising yourself with the perspective effects of different focal length lenses will help you make more successful images.
Longer focal lengths will compress perspective (creating the effect of the foreground and background appearing closer together). Wider angle lenses have exactly the opposite effect, so tend to work better as you look to include more foreground texture and detail from closer in.
Read more: What’s the Best Lens for Landscape Photography?
Composition
Although I’m not a big advocate of the rule of thirds, if you’re feeling stuck and not sure where to begin with your composition, then maybe this will help. Try not to think of it as a rule that has to be adhered to, but more of a guide or start point.
If you visualise a grid over the scene you’re photographing (similar to a noughts and crosses grid), you can place elements (such as a lone tree) on one of the intersection points. Bear in mind that all the rule of thirds really manages to achieve is spacing out the various elements equally within the frame.
In the case of a lone tree image, for instance, you might opt to have two thirds of foreground and one third of sky, or vice versa, with the tree placed off to the left/right on one of the intersection lines.
However, as always, don’t be too rigid in your application of any type of pre-empted guidance. The scene that you’re photographing and the conditions on the day will ultimately dictate what you choose to include or exclude from the frame.
Read more: Landscape Composition – Using Foreground to Create Depth
Be bold with your composition
There are absolutely no rules when it comes to composition. If you think your subject looks best dead centre of frame, then try it.
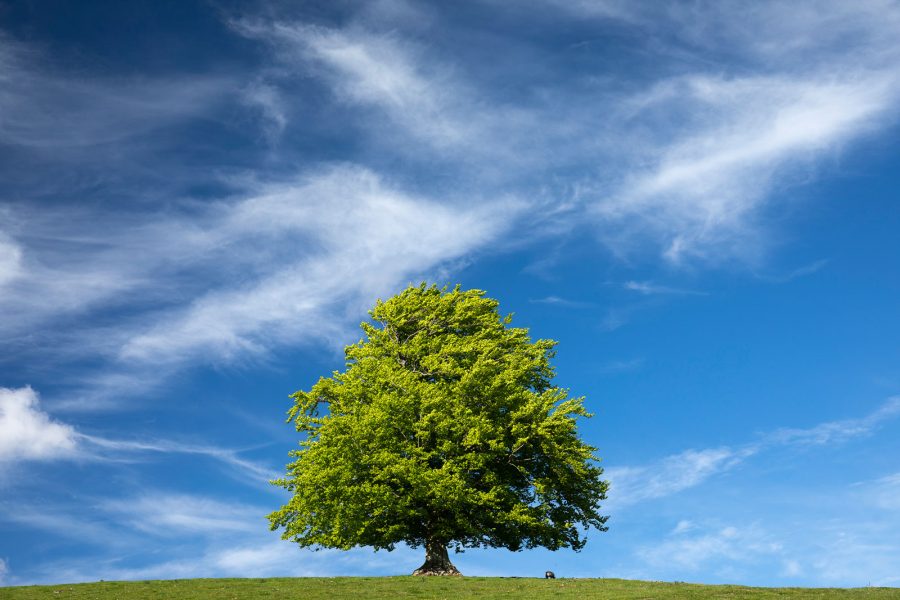
I will often experiment with placing subjects centrally and, although it doesn’t always work, I think sometimes the simplicity of the scene means a symmetrical approach works very well. I’ve driven past this scene on so many occasions but, until I saw the tree with the backdrop of a dramatic sky and wispy clouds, I’d never actually noticed it!
Go wide
If it complements your subject, why not get in close and try to add some foreground texture, shape, and detail?
I’ve shot the above composition with a focal length of around 21mm on a number of occasions and, although one of the Yorkshire ‘Three Peaks’ (Ingleborough Hill) is situated in the background, it is the gnarly, twisted old hawthorn that is the main focal point.
The ‘v’ or wishbone shape of the limestone pavement in the foreground provides an effective lead in and a sense of depth. The height at which the image is shot also makes a big difference to the final result.
I’m shooting quite low here in order to include the rough texture of the limestone, but not so low that I lose the actual shape of the pavement, and the effect of it drawing the eye into the distance.
Read more: The Use of Perspective in Landscape Photography
Go even wider
If the surrounding landscape is interesting enough and it complements your subject, consider trying a stitched panoramic image.
For once, all the elements aligned at this location about an hour before sunset. I wanted to include the diagonally sloping line of limestone in the foreground of the image, with the tree sitting perfectly on the horizon.
Shooting 10 frames in portrait orientation, and later stitching in Lightroom, allowed me to include the two small hills, left and right, which nicely balance the image. Mother Nature provided the rest, in the form of some amazing clouds tinged by the warm tones of the setting sun.
Look for the image within the image
While photographing the scene below during a recent mist inversion in the Yorkshire Dales, I thought I could maybe simplify the image down even more by concentrating on the ash tree on the scree slope, and the layers of land and mist receding into the background.
I used a longer focal length to compress perspective, and the above image was the result.
It definitely pays to check whether or not you can condense the elements of an image down to a simpler form. Even if it doesn’t always result in a better image, it will provide an alternative. I think this helps to broaden your ability to see different compositions while out at a new location.
In conclusion
There are loads of locations up and down the UK that have a fantastic lone tree as a feature. I’m sure you don’t need me to try and list them all for you! Images appear on a weekly basis on all the popular photo sharing and social media sites.
However, if it’s the whole process of photography that you enjoy, including the scouting of different locations, it’s far more rewarding to go out and try to find your own perfect example of the lone tree image. After all, trees are everywhere!
Best of luck!


