How to Use Instagram Stories to Promote Your Photos

Instagram launched Stories in 2016, and they have since become one of the most used and most viewed features in the app. The vertical images, videos, or graphics last for just 24 hours – unless saved as a highlight which will then stay pinned to the user’s profile. When an Instagram user opens up the app, they will see the profile picture of the accounts they are following along the top of their screen. Tapping on these fills the screen and the stories from all the accounts they follow start to play, one after the other.
Because of this, stories are really easy to view. Each set of stories will play automatically, from one account to the next, which is a lot less effort than having to use your thumb to scroll! It’s no surprise, then, that many photographers will want to use this feature to further promote their work.


Here I’ll be sharing some tips and ideas so you can do just this.

Why should you use Instagram Stories?
Just incase you still have some doubts about whether or not Instagram stories are worth your time, here are a few things to keep in mind.
1. Not everyone on Instagram uses the app in the same way
While some people will spend nearly all their time scrolling down and looking through posts in the feed, there are others who will almost completely ignore this and instead use all their in-app time looking through stories.
That means if you’re not posting to stories, you’re missing out on a whole new set of eyes that could be looking at your work.
2. You can share more frequently, without changing your feed
When someone visits your profile, the first thing they see will be your biography and photo feed, otherwise known as “the grid”. These two areas are what will help them determine if they want to follow you or not.
Most photographers want to reserve this area for their best work, or at least the photos that match an overall theme and style. Think of the grid like the front of a store.
What happens, then, if you’re launching a new product or you won an award, or have something you want to share with your audience that doesn’t have a stunning nature photo to go with it?
You share it to your stories! Instead of showing up on your page and staying there permanently, stories allow you to share real-time updates that don’t have to match up with everything around them.
Each story you post can stand alone, and this adds a lot more flexibility and freedom – meaning you can share more. If your feed and profile are the front of the store, then stories are where the customer can walk in, take a look around, and see what you’ve got to offer.
3. You can find new followers
Did you know that new followers can find you through your stories? I’ll go into this more in the next section.
4. It keeps your audience engaged
Gaining followers is one thing, but keeping their attention is another! Other than consistently posting great quality photos, what can you do to ensure your new follower stays engaged, and keeps coming back to see your work?
By now you know what I’m going to say. Instagram stories are much better suited for more regular updates. Since stories don’t last forever, you have more room to experiment and find out what works. They also have loads of in-built tools for increasing engagement.
Instagram story engagement tools
Within the app itself, there are loads of tools that can be used to do more with your photos and let your followers interact with them. Here are some of the best ones to try.
1. Adding Text
It wouldn’t be much of a story without some words! Tap the “Aa” button in the top right corner to bring up your keyboard and your font options.
You can change the background of the text by taping the A button, the colour of the text by tapping the colour wheel button, and the placement of the text by tapping the button with the lines.
There’s also a slider on the left of the screen that you can use to make the text smaller or larger.
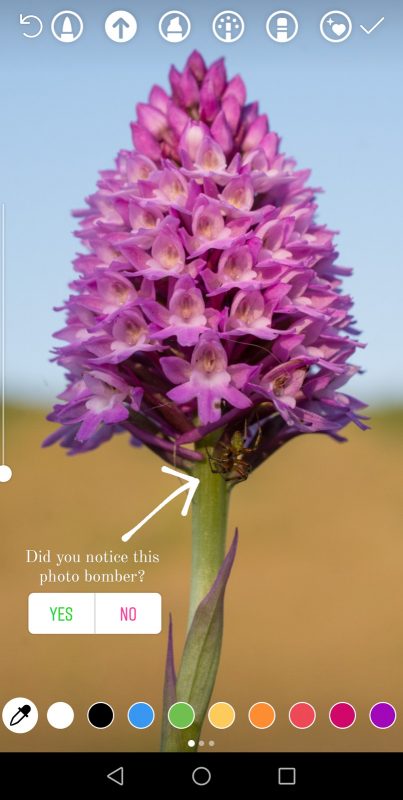
Top tip: Select a colour in the photo itself by tapping the colour picker tool and dragging it to the colour you want. This looks really smart!
2. Add lines
Maybe you want to add some art to your story, though considering this is aimed at photographers I’m going to guess that’s a no in your case. What you may wish to do is point out a specific area of your photo. You can do this by tapping the wiggly line (yes, that is the technical term) and then tapping the arrow button.
It will automatically add an arrow at the end of your line (this will save you so much time). Just like with text, you can use the slider on the left to make this thinner or thicker.
3. Stickers
Inside the sticker section you’ll find many different options and things you can add to your stories. I’ll go through some of the best ones, though do go in and explore the others as this section is being updated all the time!
Get found with the Location Sticker
This sticker is great for adding to behind the scenes and on-location shots, but also of photos you’ve taken in the past where the location isn’t obvious.
I’m not suggesting this just because it’s nice for your audience to know where a photo was taken, though. The location button can also be used to gain new followers.
Many people search Instagram by location to see what’s going on in an area. That location will have a story of its own, which you could be showing up in if you use the tag.
@Mention and #Hashtag Stickers
You don’t actually have to use these to add a working hashtag or person tag to your stories (you can just add a @ or a # when adding normal text) but it does make it easier to see the tags and tap through.
Read more: The Best Hashtags for Nature Photography on Instagram
Mentions will show other people that you are talking about them and give them the option to share that story to their profile – a great way to increase your reach.
Hashtags can also be used within your stories, in the same way as locations. Each hashtag has a story too, and if you make it to that story you may gain some new followers.
GIFs
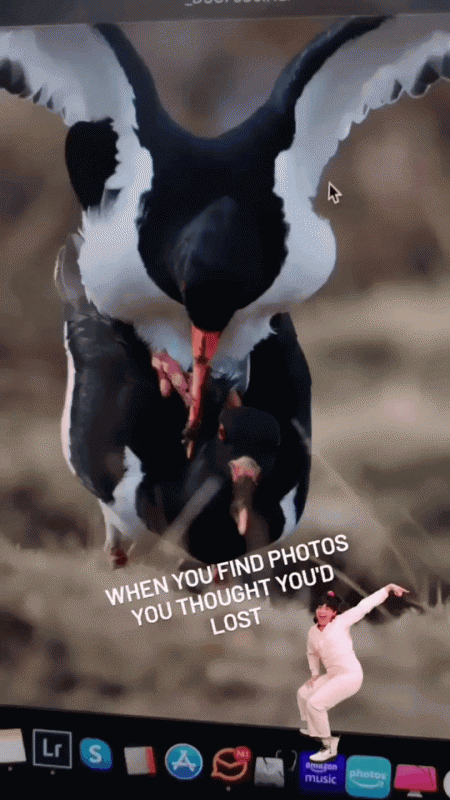
I love a good GIF. These short animations can add an extra bit of flare or fun to your story, depending on which you pick. Stories are a great way to show your individual personality, so don’t be afraid to use some of these every so often.
GIFs can also be used more practically, for example using an animated arrow to point out something in your photo or using a GIF that says “Link in Bio” or “Swipe Up”. This is a bit more exciting and stands out more than normal text – great for announcements and updates.
Sliders
This is a super easy way to let your followers interact with your stories, and to gauge general opinion on a matter. You can add a question to it, or just leave it blank depending on the context.
When you open this sticker you’ll see various emoji (icon) options to use on the slider. Swipe these from right to left to see a few more.
Your audience can then move this slider along where they wish, and the results will be averaged out for you.
Polls
Want to know what your audience thinks about something? Why not ask them by using a poll?
Tap the Poll sticker to add an easy-to-tap A/B poll. Yes and No are automatically added – just tap the words to change the text if you wish.
Quizzes
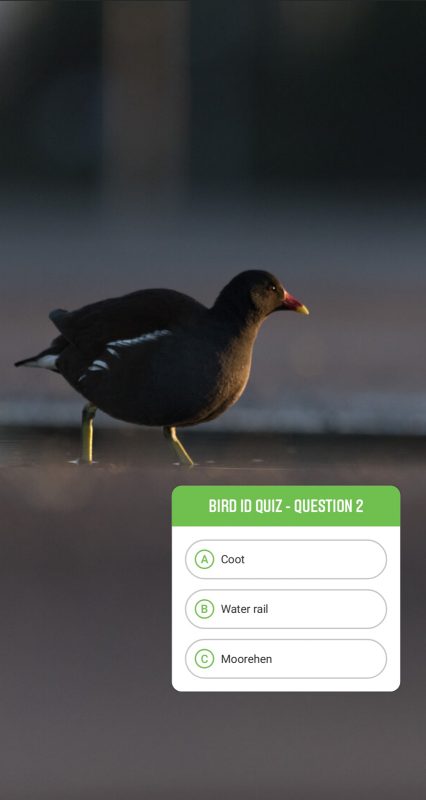
Need more answer options? You could use the Quiz feature! However this will ask you to select a correct answer. Wrong and right answers will be shown to your audience, so this could be a bit confusing if you’re not actually running this type of challenge.
So, instead, you could use this feature for its intended purpose – to make a quiz!
Though these can take a bit of extra time, this is a fun way to get your audience interacting with you. It doesn’t have to be complicated; 5 or more questions would be more than enough for a good game.
Question boxes
For longer, more open-ended questions, the Question sticker is a brilliant tool! Ask your audience questions so you can find out more about what they like, or share their answers if you think it would be useful to others or would start an interesting conversation.
Using the same feature, you can open the virtual floor to questions for a Q&A. Swipe up on that story to see what your audience wants to know, and share them with your answers. You can take a photo at the time as a background for this, or you can swipe up to add something relevant from your gallery.
Top tip: Head to your Instagram archive area to see question stories and their answers from more than 24 hours ago. You can still see and share the answers from here by swiping up.
To see how your audience is using these (and other) features, head to your own story and swipe-up on the page with the interaction on it. Here you will see how many people have seen the story, exited the story, and any answers to questions. Quite often you can share these results too!
Important note: You will be able to see who answers the questions. It is best practice to keep this information to yourself. If you’d like to tag people in their answers, make sure you make this clear when you post the question.
Countdown clock
The Countdown Clock is a brilliant feature. This can be used to add an element of excitement and suspense to launches, announcements, the end of a sale, or anything else that you want to build up to.
Once on your story, viewers can tap it to set reminders and share it themselves. It will also save to your sticker area for the duration of the countdown, so all you have to do is tap the countdown sticker to keep re-adding it to your story – though, keep in mind, you can only add it to one of your stories every 24 hours.
Post ideas for Instagram Stories
Now you know about some of the tools on offer, how can you use them? Here are some ideas!
1. Tell a story with your photos
Maybe your best pictures are on your feed, but you’ll likely have others that will build a bigger picture of what happened on that day, during that trip, or in that moment. Using text and other elements, try telling the story of how you took the photos, or share information about the photo’s subject.
To make these stories above I took a screenshot of a photo on my website and added text once it was loaded in Instagram stories.
2. Let your audience get to know you
I’m not saying you need to share all of your personal life and every meal you eat (unless you’re a food photographer, then by all means go for it!), but just sharing a little bit about you and your life can be helpful to your photography. Why? Because people like interacting with people!
They like buying from people too, so reminding them that there’s a real human-being behind that camera could be a great way to boost print sales, workshops, and courses. If you’re brave, you could try speaking directly to your camera – but for most people some text on a photo will be just as helpful.
3. Show how you work behind the scenes
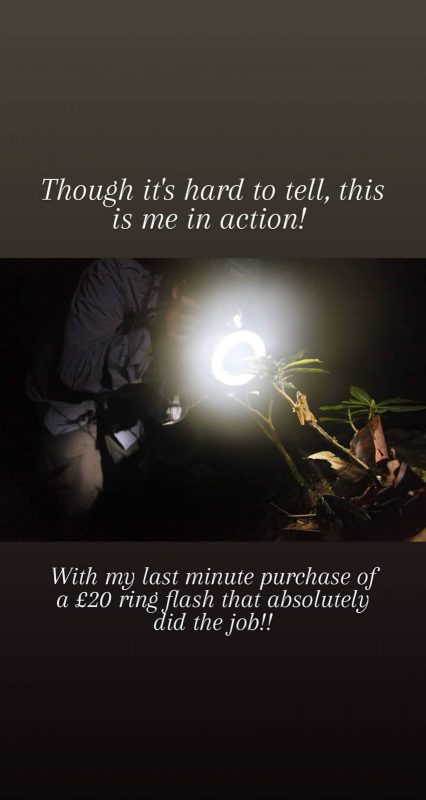
Photography, despite being around for centuries, still has a lot of mystery surrounding it. People always have questions about what gear you use, how you edit your photos, and how exactly did you get that shot of the bird mid-flight?
If your audience likes your final product (the photos on your feed), then they are probably going to be fascinated to see the behind the scenes as well. After all, those are the most popular parts of Attenborough documentaries for a reason.
It could be the view from behind your camera, your desk set-up, or even your (not so) very glamorous hostel accommodation. So long as you feel comfortable sharing it, this is a great way to keep your audience’s attention and let them get to know you and your work.
Top tip: If your phone has the ability, why not try out making some simple time-lapses of you working? It could be packing your bag, taking photos, or something else. This is a fun way to show a longer process without taking up too much time.
4. Be part of a community
There’s a reason it’s called social media. Back in the early days, #FF or #FollowFriday was a regular feature on most people’s profiles. The idea was very simple – you share people or accounts that you think are worth following and say a bit about why.
You don’t have to limit this to one day of course, but it might help you to remember to do it.
How exactly do you share someone else’s post in your story? Well, just head to the post you want to share and tap the little arrow just below the photo. A menu will pop up and you’ll see the option to “Add Post to Your Story”. Tap this, add some text, and post!

Top tip: Sharing someone’s post will not automatically notify them! Type @ and then their username to tag them in your stories. Not only does this let them know that you’ve kindly shared their work, but it also gives them the option to share your story to their own, which could lead to more eyes on your work.
5. Share advice and tips
If you’ve found a way to solve a common problem, or have been asked a question about your work, share your tips and tricks to your stories and give back to your audience.
In conclusion
You don’t have to use all of these tips every day, or even every week, but next time you feel stuck on what to post to your stories come back and see if this can help you come up with some ideas.
Stories are called stories for a reason – they are a place to show and tell. The best way to do this is to find what works for you, so go experiment and see what you can come up with!


