How to Photograph Landscapes at Death Valley National Park

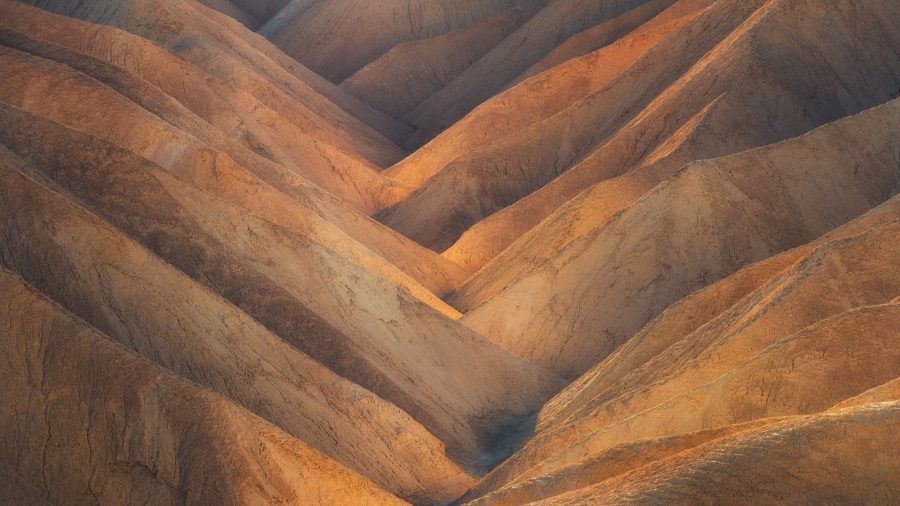
The name may not sound all that pleasing, but in my opinion Death Valley is one of the most incredible places in North America for landscape photography. Home to towering sand dunes, hexagonal shaped salt flats, mysterious ‘sailing’ rocks, colorful mountains, and arid valleys full of gigantic mud cracks, the photographic possibilities are endless.
However, capturing a compelling image in this area is not necessarily guaranteed. With over 5,200 square miles of landscape to be explored, it takes time, patience, effort, and a knowledge of the best times to go, in order to give yourself the best opportunity of walking away with some incredible shots.


Seasons matter
Firstly, there is definitely a good time of year to visit Death Valley, and definitely a time of year not to visit. Death Valley was given its name for a good reason. It is a region that can easily hold a risk of death for those who visit it unprepared. I promise that I’m not trying to be dramatic here but, in all seriousness, people die almost every year in Death Valley from not understanding the hazards- in particular, the heat.
Death Valley is indeed the hottest place on Earth, having had the hottest temperature ever recorded back in 1913, of 134 degrees Fahrenheit. Between the months of April and September, temperatures can easily soar up to 125 degrees Fahrenheit, creating many issues with health, and with vehicles as well. I recommend visiting the area between October and February. These months are much cooler and also provide the best opportunities for a chance of rain and dramatic skies in the valley.
Staying safe and lodging
Coming into Death Valley means coming in prepared. You will definitely want to plan out a few details prior to your adventure. Firstly, if you are looking for a hotel to stay at within Death Valley, you have three options. Lodging can be booked up to a year in advance, so get it sorted early. There are a total of twelve campgrounds, only one of which is not run on a first-come, first-served basis.
Also, make sure you fill up your vehicle with gas outside of Death Valley, as there are only three gas stations within the area and they are usually very highly priced. Cellular service is also pretty non-existent within the area, so I usually trek with a GPS and emergency beacon in case anything goes wrong. With that being said, it is also wise to travel with another person and to bring a basic first aid kit with you at the very least, as emergency services would take a while to get to you.
Venture away from the crowds
The Mesquite Sand Dunes, Zabriskie Point, Badwater Basin: these are shooting locations that you will hear every photographer refer to within Death Valley. They are indeed fantastic, but they are also usually very crowded with other photographers and tourists. My recommendation would be to go against the grain and look for locations that are nearby to those spots, but are away from the crowds. You can find some amazingly unique perspectives and hidden trails just by simply ‘getting lost’.
However, remember to only get lost wisely, and always take a GPS. Removing yourself from the popular spots will allow you to give yourself the upper hand on unique frames and angles, and also get into the more pristine landscapes that haven’t been affected by the wear and tear of foot traffic.
Most people head directly to the Mesquite Sand Dunes, and this presents a huge problem for photographers trying to find perfect, untouched ridgelines. There are actually three other sets of dunes in the park: Eureka, Panamint, and Ibex. These will all provide much better opportunities for your foot prints to be the only ones you encounter.
Take time to scout
This tip goes somewhat hand-in-hand with the previous suggestion of avoiding the crowds. Death Valley is huge. It’s one of the most vast landscapes that I’ve ever documented, and there are some wonderful gems hidden within it. But to find these gems you’re going to have to put in some effort, for a couple of reasons.
Firstly, as much as it would be amazing to use a drone to scout the landscape, they are illegal within the national park. This means that, for the most part, you’re going to be doing the research on foot. Secondly, Death Valley is a very ‘fluid’ landscape. By that, I mean it can change so much month-to-month, as evaporation, movement within groundwater, and flash flooding can cause parts of the landscape to actually move their locations.
There have been several instances in which I have geo-tagged a specific area of patterns in one month, and then returned a month later to find that they weren’t there any more, but were almost a half mile further south.
Get low with your wide angle
The valley floor is full of wonderful and intricate details that make for quite compelling frames. From broken mud cracks, to hexagonal salt patterns, to rivers (yes, there is water out there): these all create a wonderful mood for images.
These details are best conveyed through the use of a wide-angle lens. But don’t just throw on the wide-angle and shoot from waist high. Get a foot or so off the floor, get as wide as you can, and those lines and patterns begin to fill the frame in an empowering way!
Utilize a long lens
Your go-to lens for landscapes may be a wide-angle lens, but Death Valley provides a handful of opportunities to use a longer focal length for detail and compression shots. I’ve found myself shooting with both the Nikon 70-200mm and Nikon 200-500mm lens within Death Valley. Any of the sand dunes are absolutely fantastic for using a longer focal length, as well as paying attention to the details within the mountains.
There is also a little hidden spot within Death Valley at which using a telephoto lens is a lot of fun- that is, if you’re interested in military jets! Rainbow Canyon provides a wonderful spot to watch and photograph military pilots traversing the canyon and flying by, sometimes just a few hundred feet away. There is no schedule for when the jets will pass through (aside from being daily), so go with some patience and see what happens.
Embrace the night sky
The weather in Death Valley can be quite calm throughout most of the year, and this isn’t necessarily a good thing for photographers. The calm weather usually results in minimal clouds and often clear skies. We all know that bluebird skies are the worst enemy of a landscape photographer, but take advantage of this at night.
Read more: Astrophotography Guide – Things You Need to Know
The night sky over Death Valley is one of the darkest in the nation, with an infinite number of stars twinkling above, shooting stars streaking past, and the Milky Way shining brightly. After dinner, go out and take in the wonderful night sky: it can provide some stunning scenes.
In conclusion
Simply put, Death Valley is a huge playground for photographers. It can take hours to reach destinations by car, and hours to reach destinations on foot too. It is not a place to go to for a quick day trip.
Give yourself at least a few days to venture around and also work with the sky, as a few days can easily pass in between a good sunset or sunrise. I truly believe that the park is one of the best places to test your patience, with excellent rewards.
Bonus tip: don’t limit yourself to the park
The park itself provides endless shooting locations, but it is also in close proximity to some other wonderful spots. Rhyolite is a ghost town just outside the east park boundary. It has some incredible ghost town structures that make for a fun evening of night sky shooting. Just outside the west park boundary are the Alabama Hills. This is a place full of giant boulders and arches, backdropped by the Sierra Nevada mountains.
Read more: Where to Photograph Landscapes in the USA


