How to Balance Flash with Ambient Light in Macro Photography

In macro photography, we often look to reveal the tiny details in our subject matter, which aren’t always evident to the naked eye. One challenge we face is ensuring adequate focus and depth of field. Another is balancing flash with ambient lighting.
This can prove difficult when getting very close to our subject using macro lenses and sometimes extension tubes.


A tiny subject may only be one or two centimetres from end to end. Hence, we frequently find that small apertures, such as at least f/16, are required to ensure that a good portion of the subject is in focus.

So, particularly when using longer focal length lenses and hand-holding the camera, supplementary lighting is often required. Especially if we are to avoid degrading the image by using very high ISOs.

Of course, with static subjects, we also have the option of using a tripod and longer exposures. But, in many situations, the use of some degree of flash lighting comes with other benefits too.
As we discuss some of these, it will become clear how important it is to adjust both the degree and the direction of the lighting to optimize its effects and keep the look natural.
Benefits of supplementary lighting
Particularly on sunny days, the strong, direct light creates shadows on under-surfaces or one aspect of our subjects.

A degree of light aimed from roughly the opposite direction to that of the natural light source can help provide some detail in what would otherwise be a featureless zone.

Another consideration when zooming in on small subjects in ‘cluttered’ environments is how to avoid distractions.
Positioning ourselves to influence the shooting angle is very important here, as we must be aware of backgrounds and what else is included in the frame.

A degree of blurring can help conceal unwanted foreground or background elements, so adjustments or compromises to the depth of field may be required.

Additional supplementary lighting aimed carefully can help reveal and enhance features we want to be noticed, as our attention is naturally drawn to bright, well-lit features.
Flash lighting can also serve to darken and thus conceal unwanted background features.
This is due to the phenomenon of ‘fall-off’: the fact that the degree to which flash raises the light levels tends to decrease rapidly with increasing distance from the flash.

On the downside, this can also lead to objects a little nearer than your subject being over-exposed and if overdone, backgrounds are rendered virtually black.

This isn’t usually ideal, but in certain circumstances, it might be appropriate.
Specifically, to emphasize some aspects by making use of the directional quality of the light, effectively ‘spot-lighting’ the feature and isolating it against a dark background.
Read more: How to Use Foregrounds & Backgrounds in Macro Photography
Controlling flash lighting
The degree and type of flash lighting are important.
In nature photography, we are usually looking for a ‘natural’ look. So, when using flash, we don’t want it to be blatantly clear that additional lighting was used.
Flash tends to provide a unidirectional, strong, and direct beam of light. This can produce a rather harsh look with very dark, unclear, and undefined shadows.

We also don’t want to create over-exposed areas on our subject or in the foregrounds, particularly on the shiny, reflective surfaces of leaves and insects.
To avoid all this, it’s worth considering reducing the intensity of the lighting used and trying to balance it to some degree with the natural, ambient light.
In addition to changing the amount, it’s also worth considering the type of light.

On an overcast day, for example, it may be worth softening the flash with a diffuser or bouncing it off a reflector onto your subject. Ultimately, we often must accept that whatever we do will be a compromise.
To the discerning eye, it will still be evident that flash was employed, but the main thing is that it doesn’t dominate the photograph or create distractions.
Equipment to consider
There are several different types of flash guns and a large range of additional accessories. These can help you manage and take control of the impact and effect of supplementary lighting in your macro work.
I won’t go into this in too much detail, but here are some of the main options to consider:
- Flash gun or ‘speedlight flash’ attached to the hot shoe of the camera.
- Flash cords and brackets to enable the flash gun to be positioned off-camera but nearby.
- Additional flash guns used for off-camera flash and fired in synchronicity using a wireless flash trigger or transmitter.
- Reflectors to bounce the flash or ambient light in from other directions to balance the light and provide more detail in shadow areas.
- Diffusers and soft boxes which fit over the flash to soften and spread the light.
- Light intensifiers that, like a spotlight, serve to channel the light from the flash gun, intensifying it to some degree.
- Ring flash units, designed to enable shadow-free, close-up photography by providing a light source that surrounds the lens. These also help provide more even lighting.
- Twin-light flash – two flash guns attached to the end of the lens. The lights can be individually positioned and the intensity of the light from each adjusted independently.
- Colour filters. The colour temperature of your flash may differ slightly from the natural light. So, when trying to record nature precisely as it is, white balance adjustments in camera or processing may be required. Or you can use filters over the flash to alter its colour temperature to match the ambient light.
Read more: Introduction to Macro Photography – Equipment
Strategies for success
1. Positioning the flash gun away from the camera provides a more ‘natural’ look to the direction of the light and perhaps provides more even illumination of foreground, subject, and background.

2. The use of diffusers to soften the light, and/or reflectors to increase the size of the light source or to channel it in from specific directions. A second or third flash gun will also serve this purpose.

3. These can be positioned to even out the lighting and reduce shadows, or to provide better lighting for more distant objects that form the background.
4. Finally – and this is perhaps the most important strategy in many situations – we can attempt to balance the artificial light with a good measure of the existing natural light to provide for the needs of our exposure.
This generally means that we use the bare minimum flash for our needs.

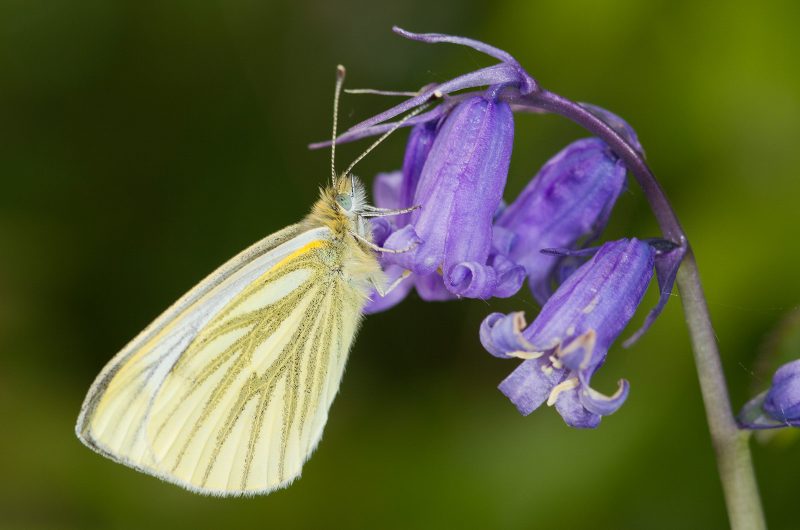
For example, if we are photographing a settled butterfly with a 100mm macro lens without a tripod, we may decide that 1/100th is the slowest shutter speed we are likely to get away with.
However, having decided that we don’t want to increase our ISO above 400 and that we need an aperture of f/11, we find that a shutter speed of 1/25th is needed.
We would then introduce just enough flash to enable us to bring the shutter speed back up to 1/100th and no higher.
This might result in a slightly darker background than if we hadn’t used any flash and perhaps a slightly darker shadow cast by the butterfly onto the leaf.
However, at least these effects will be minimized and our photograph will be sharp.
In conclusion
There’s a lot to consider when using flash in ambient light, and the requirements in every situation are likely to differ.
As with most things, practice and experience make the difference, so take the time to experiment with different approaches, particularly when a static subject provides you with the time to do so!


